Baking bread from scratch sounds difficult, but this seeded bread recipe proves otherwise. You won’t need to knead the dough or use fancy equipment. The method relies on letting the dough sit for several hours while natural processes create the texture and flavor. Many people avoid bread baking because they think it requires too much work or special skills. This recipe changes that completely. You mix everything in one bowl, let it rest, shape it gently, and bake. The result is a crusty loaf filled with seeds and oats that tastes like it came from an expensive bakery. Anyone can make this bread, even if they’ve never baked before.
Why This Method Works So Well
Traditional bread recipes tell you to knead for ten or fifteen minutes. That step builds the gluten structure that makes bread chewy and gives it good texture. This recipe skips kneading entirely. Instead, the dough sits for three hours at room temperature. During that time, gluten forms on its own through a process called autolyse. The wet dough helps this happen naturally. You save effort while getting the same results. The long resting time also lets the yeast work slowly, which creates better flavor than fast-rising recipes. Many bakers now prefer this approach because it fits into their schedule without requiring constant attention.
What Seeds and Oats Add to Your Bread
This bread contains four different types of seeds plus oats. Each one brings nutrition and texture. Pumpkin seeds have magnesium and zinc, which your body needs for many functions. Sunflower seeds provide vitamin E and selenium. Flax seeds contain omega-3 fatty acids that reduce inflammation. The oats add fiber that helps digestion and keeps you full longer. Together, these ingredients turn basic bread into something much healthier. The seeds also create a nice crunch and nutty taste throughout each slice. Store-bought bread rarely includes this many wholesome ingredients.
Choosing the Right Flour
Bread flour works better than all-purpose flour for this recipe. The difference comes down to protein content. Bread flour has more protein, usually around thirteen percent. All-purpose flour has about ten percent. More protein means more gluten development, which creates better structure. Since this dough doesn’t get kneaded, using bread flour becomes even more important. The extra protein helps the dough hold its shape and rise properly. The seeds and oats are heavy, so the dough needs strong gluten to support them. You can use all-purpose flour if that’s what you have, but bread flour gives noticeably better results.
Understanding Instant Yeast
This recipe calls for instant yeast, sometimes labeled as rapid-rise or bread machine yeast. It differs from active dry yeast in a few ways. The particles are smaller and dissolve faster. You can mix it directly with flour without proofing it first in water. This saves a step and makes the recipe easier. Instant yeast also tolerates temperature changes better than active dry yeast. Even a small amount produces plenty of rise when given enough time. The yeast feeds on sugars in the dough and produces carbon dioxide gas. Those gas bubbles get trapped in the gluten network and make the bread fluffy.
How Honey Helps
The honey in this recipe does more than sweeten the bread. Yeast feeds on the sugars in honey, which helps fermentation work well. Honey also makes the crust brown beautifully during baking. The natural enzymes in honey make the dough softer and improve texture. Unlike white sugar, honey adds subtle flavor notes that complement the nutty seeds. It also helps the bread stay fresh longer because honey attracts and holds moisture. Two tablespoons provide just enough sweetness without making the bread taste like dessert.
Getting Water Temperature Right
Water temperature matters when working with yeast. Too hot kills the yeast cells. Too cold slows them down so much that rising takes forever. The recipe calls for water around ninety-five degrees Fahrenheit. That feels warm but not hot when you test it with your finger. If you don’t have a thermometer, mix two parts cold water with one part boiling water. This usually gets you close to the right temperature. Room temperature water works too, but the first rise will take longer. Proper water temperature ensures the yeast activates quickly and the dough rises on schedule.
Mixing the Dough
The mixing step takes only a few minutes. You whisk the dry ingredients together first so everything distributes evenly. Then you pour in the honey-water mixture. Use a wooden spoon or spatula to stir everything together. The dough will look rough and sticky. Some people worry when they see how wet it is, but that’s correct. Keep folding the mixture until you don’t see dry flour anymore. You might need to use your hands briefly at the end. Don’t stir too much or too hard. Just get everything combined, then stop. The dough should form a shaggy ball that barely holds together.
The First Rising Period
After mixing, cover the bowl and leave it on your counter for three hours. The bowl doesn’t need to be in a warm spot. Normal room temperature works fine. During these three hours, the yeast multiplies and produces gas bubbles. The dough will roughly double in size. You’ll see bubbles on the surface and sides where the dough touches the bowl. The texture becomes even stickier and more elastic. The gluten strands get longer and stronger without any kneading. This hands-off time lets you do other things while the dough develops. Just set a timer and forget about it.
Refrigerating for Better Flavor
You can bake the bread right after the three-hour rise, but refrigerating it improves the taste significantly. The recipe suggests twelve hours to three days in the fridge. This cold period slows the yeast but doesn’t stop it completely. Meanwhile, other processes continue that develop complex flavors. The bread ends up tasting richer and more interesting, similar to sourdough. The cold also firms up the dough, making it easier to handle when shaping. Even a few hours in the refrigerator makes a difference. If you plan ahead, the longer cold rest produces the best results.
Shaping the Sticky Dough
Working with this dough requires a light touch and plenty of flour on your hands. The dough will be very sticky after rising. Dust your hands generously with flour before touching it. You can shape it right in the bowl or turn it out onto a floured surface. Gently pull the edges toward the center to form a rough ball. Don’t squeeze or press hard because that pushes out the air bubbles you spent hours creating. The shaped ball won’t look perfect. It might sag or spread a bit. That’s normal for wet dough and creates the rustic look of artisan bread.
Preparing Your Baking Pan
A regular nonstick baking sheet works perfectly for this bread. Sprinkle some flour or cornmeal on the pan before placing your shaped dough on it. This prevents sticking and adds a nice texture to the bottom crust. Some people use parchment paper instead, which also works well. Make sure your pan is truly nonstick or properly prepared. Otherwise, you might struggle to remove the bread after baking. You’ll bake the bread directly on this sheet, so choose one that can handle high oven temperatures without warping.
Adding the Seed Topping
Mix the topping seeds in a small bowl, then sprinkle them over your shaped dough. Press gently so they stick to the surface. The seeds add visual appeal and extra crunch to the finished bread. If they’re not sticking well, very lightly mist the dough with water first. The seeds will toast during baking and develop deeper flavor. Don’t skip this step even if you already have seeds mixed into the dough. The topping creates a professional bakery appearance and makes each slice more interesting.
The Final Rest
After shaping and topping, let the dough rest for forty-five minutes before baking. This short rest lets the gluten relax after being disturbed during shaping. The yeast also gets active again at room temperature and produces more gas for a better rise in the oven. Cover the dough loosely so it doesn’t dry out. During this time, preheat your oven completely. A fully heated oven ensures even baking and good crust development. If your shaped loaf has spread too flat during this rest, use floured hands to reshape it gently.
Why You Should Score the Dough
Scoring means making shallow cuts on top of the dough before baking. Use a sharp knife or kitchen shears to cut a simple slash or X pattern. The cuts should go about half an inch deep. This step controls where the bread expands in the oven. Without scoring, the bread would crack randomly along the sides. The cuts also create the ridges and “ears” that make artisan bread look professional. Make your cuts quickly and decisively. Dragging the knife slowly tears the dough instead of slicing it cleanly.
Creating Steam in Your Oven
Bakeries use special ovens that inject steam during the first part of baking. Steam keeps the crust soft initially so the bread can expand fully. You can recreate this effect at home by placing a pan of boiling water in the oven. Put a metal baking pan on the bottom rack when you preheat the oven. When the bread goes in, carefully pour three to four cups of boiling water into that pan. Close the oven door quickly to trap the steam. This step is optional but makes a noticeable difference in crust quality and how much the bread rises.
Baking Time and Temperature
The oven should be at four hundred twenty-five degrees Fahrenheit. This high temperature creates good oven spring, which means the bread puffs up quickly when heat hits it. Bake for forty minutes total. Check after thirty minutes to see if the top is browning too fast. If it looks very dark, loosely cover it with foil for the remaining time. The bread is done when the crust is deep golden brown and sounds hollow when you tap the bottom. An instant-read thermometer should show one hundred ninety-five degrees Fahrenheit in the center of the loaf.
Letting Bread Cool Properly
Wait at least ten to twenty minutes before cutting into your fresh bread. This cooling time is important even though the bread smells amazing and you want to eat it immediately. The interior is still cooking slightly from residual heat. More importantly, the moisture inside needs time to redistribute. Cutting hot bread gives you gummy, compressed slices that stick to the knife. The steam escaping from hot bread also makes it go stale faster. Put the bread on a wire rack so air circulates around it. This keeps the bottom crust crisp instead of soggy from trapped steam.
How to Store Homemade Bread
Homemade bread doesn’t contain preservatives like store-bought loaves. It stays fresh at room temperature for about three days if stored correctly. Keep it in a paper bag, bread box, or wrapped in a clean towel. Avoid plastic bags at room temperature because they trap moisture and make the crust soft and tough. If you need to keep it longer, refrigerate it for up to ten days. The fridge slows mold growth but makes bread go stale faster. For the best long-term storage, slice the bread and freeze it. Wrap slices in plastic wrap, then put them in a freezer bag. Frozen bread keeps for three months.
Comparing Homemade to Store-Bought Bread
Making bread at home gives you complete control over ingredients. This recipe uses real food: flour, water, yeast, honey, oats, and seeds. Check the ingredient list on most commercial breads and you’ll find additives, preservatives, and refined oils. Homemade bread provides more fiber, protein, and nutrients per slice. It doesn’t contain high-fructose corn syrup or unnecessary sodium. You know exactly what goes into every loaf. The taste is also fresher and more complex than mass-produced bread. The small amount of time you invest creates a product that’s better for your health and tastes significantly better.
Fixing Common Problems
If your dough doesn’t rise well, check your yeast expiration date. Old yeast loses strength and won’t produce enough gas. Water temperature could also be the problem. Very hot water kills yeast, while cold water keeps it inactive. Dense bread usually means the dough didn’t rise long enough or you added too much flour during shaping. Flat bread that spreads instead of rising up suggests overproofing or not enough gluten development. Pale crust means the oven wasn’t hot enough or the baking time was too short. Dark crust with raw middle means the oven is too hot. Understanding these common issues helps you adjust and get better results next time.
Making Bread Part of Your Routine
Once you make this bread a few times, it becomes easy to fit into your schedule. Mix the dough before bed and let it rise overnight in the fridge. Shape and bake it the next evening. Or mix it in the morning, refrigerate it during the day, and bake it after dinner. The flexible timing works around your life instead of demanding strict attention. Fresh homemade bread a few times a week costs less than buying artisan loaves and tastes better. Your family will appreciate the effort, and you’ll enjoy the satisfaction of creating something wholesome from simple ingredients.
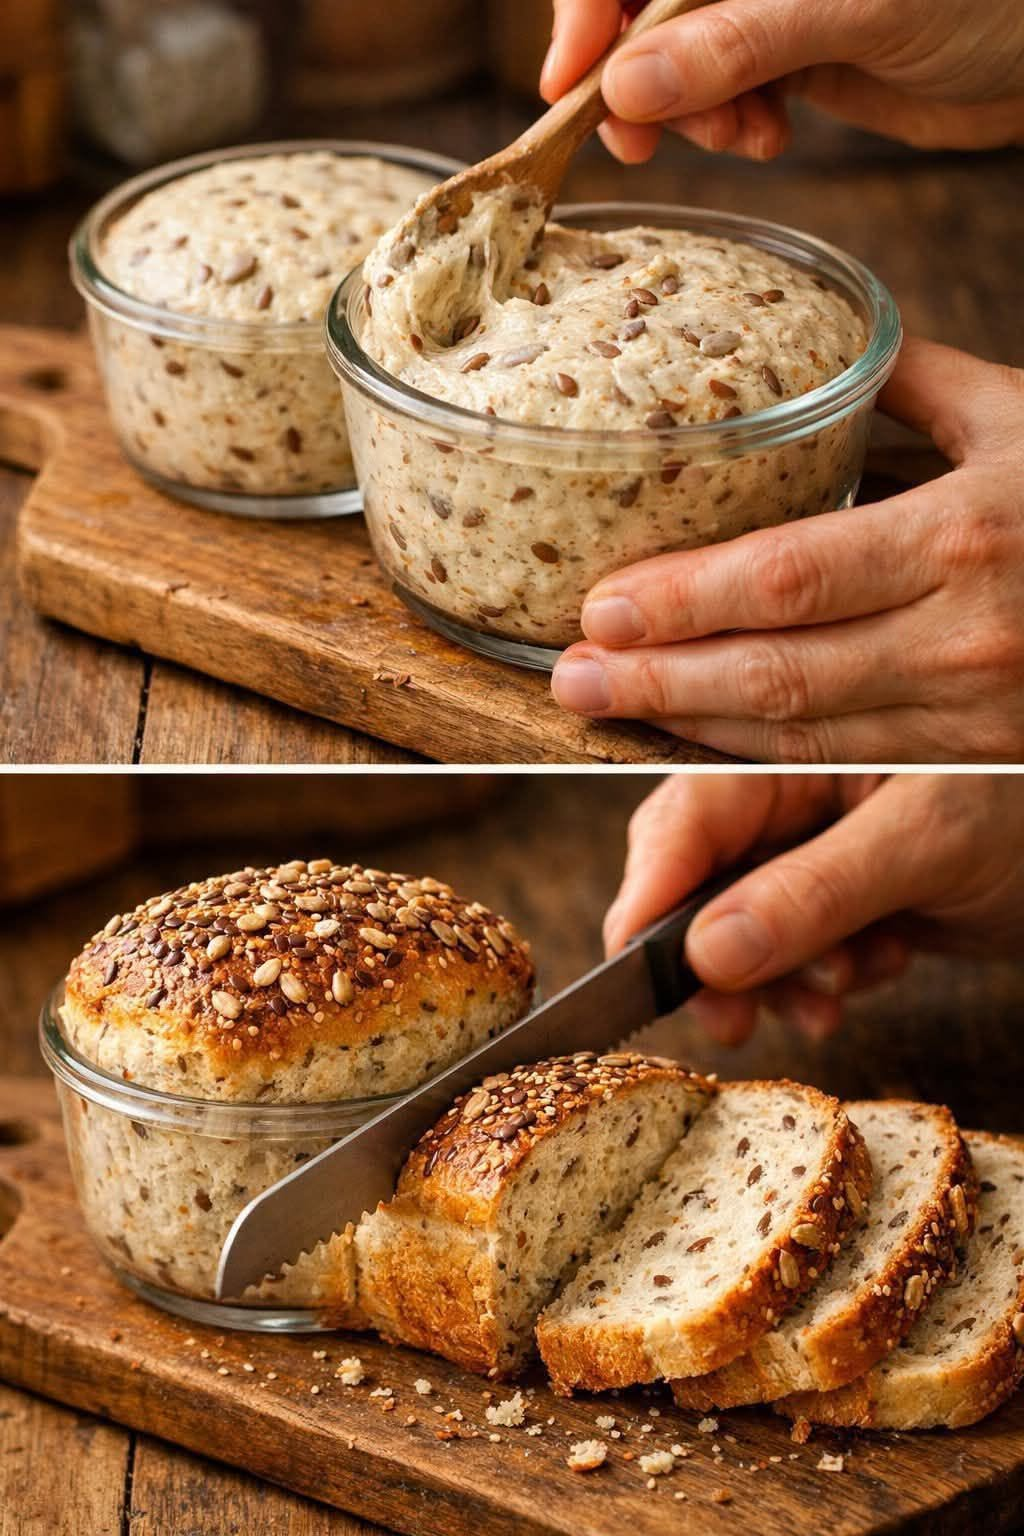
Seeded Bread No-Knead
 Recipe by admin1
This easy bread recipe requires no kneading and minimal hands-on time. The dough is filled with nutritious seeds and oats that add flavor, texture, and health benefits. After a few hours of resting, you get a crusty, golden loaf with a soft interior that rivals bakery bread.
10 to 12
servings4
hours40
minutes4
hours40
minutesIngredients
- Main Dough:
3 cups (390g) bread flour, plus extra for dusting
2 teaspoons (6g) instant yeast
1 cup (85g) old-fashioned rolled oats
1/4 cup (30g) pumpkin seeds
1/4 cup (30g) sunflower seeds
2 tablespoons (18g) flax seeds or sesame seeds
2 teaspoons coarse salt
2 tablespoons (43g) honey
1 and 1/2 cups (360ml) warm water (95°F/35°C)
Cornmeal for dusting (optional)
- Toppings:
1 tablespoon (5g) rolled oats
1 tablespoon (8g) pumpkin seeds
1 tablespoon (8g) sunflower seeds
1 teaspoon flax seeds or sesame seeds
Directions
- In a large bowl, whisk together bread flour and yeast. Add oats, pumpkin seeds, sunflower seeds, flax seeds, and salt. Whisk to combine.
- Stir honey into warm water until dissolved. Pour over dry ingredients. Mix with a spatula or wooden spoon until all flour is moistened. Use hands if needed. Dough will be very sticky and shaggy.
- Cover bowl tightly with plastic wrap or foil. Leave at room temperature for 3 hours. Dough will double and show air bubbles.
- Place covered bowl in refrigerator for 12 hours to 3 days for better flavor and easier handling. This step is optional but improves results.
- Dust a nonstick baking sheet with flour or cornmeal. With floured hands, gently shape dough into a ball. Place on prepared sheet.
- Mix topping seeds together. Sprinkle over dough and press gently to adhere. Cover loosely and rest 45 minutes.
- Heat oven to 425°F (218°C) during the 45-minute rest.
- Use a sharp knife to cut a slash or X pattern about 1/2 inch deep on top of dough.
- Place metal pan on bottom oven rack. Put bread on center rack, then carefully pour 3-4 cups boiling water into bottom pan. Close door quickly.
- Bake 40 minutes until crust is golden brown and bread sounds hollow when tapped. Internal temperature should reach 195°F (90°C). Tent with foil if browning too quickly.
- Remove from oven and cool on wire rack for at least 10-20 minutes before slicing.
- Keep loosely covered at room temperature for 3 days or refrigerate for up to 10 days.
Notes
- Cold fermentation: Refrigerating the dough after the first rise greatly improves flavor and makes handling easier. Even 2-3 hours helps.
- Sticky dough: Keep extra flour handy. This wet dough is supposed to be sticky. Flour your hands generously when shaping.
- Dutch oven method: You can bake this in a preheated Dutch oven instead of a baking sheet for an even crustier result.
- Yeast type: Instant yeast works best. If using active dry yeast, dissolve it in the warm water with honey before adding to flour.
- Seed options: Substitute other seeds based on what you have available. Keep total amounts similar.
- Freezing: Slice cooled bread, wrap well, and freeze up to 3 months.


