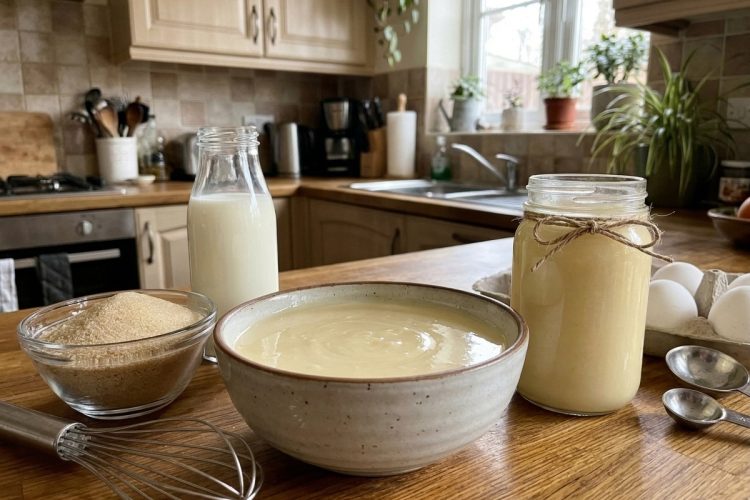
Sugar Free Condensed Milk is an excellent homemade alternative to traditional sweetened condensed milk for anyone who wants to enjoy their favorite desserts while reducing their sugar intake. It has a rich, creamy consistency, a naturally smooth texture, and the sweetness needed for baking, coffee, and other homemade treats. Prepared with a few simple ingredients, this recipe creates a delicious condensed milk substitute without relying on regular white sugar. It is especially useful for people following a low-carb or keto-friendly eating plan.
Traditional sweetened condensed milk is commonly used in cakes, cookies, fudge, puddings, and many other desserts. However, its high sugar content can make it difficult to include in recipes when you are trying to limit carbohydrates. Store-bought sugar-free alternatives can also be difficult to find, and some products do not have the thickness or flavor needed for baking. Making your own version at home gives you more control over the sweetness, consistency, and ingredients.
This homemade keto condensed milk recipe combines heavy cream, butter, and powdered sweetener to produce a thick, silky mixture. A little vanilla extract can also be included for extra flavor. The ingredients are gently simmered together until the liquid reduces and develops a richer texture. Although the cooking process takes some time, the preparation is simple and requires very little hands-on work.
One of the best things about this recipe is its versatility. You can use it in sugar-free desserts, stir it into coffee, or add it to homemade ice cream and other sweet treats. It also works well when you want to adapt traditional recipes to suit a lower-sugar lifestyle. Once you have a jar in the refrigerator, you will have a convenient homemade ingredient ready whenever a dessert craving strikes.
This Sugar Free Condensed Milk Recipe
There are several reasons to prepare sugar-free condensed milk at home instead of depending on commercial alternatives. First, the recipe uses a small collection of everyday ingredients that are easy to find in most grocery stores. Heavy cream provides richness, butter contributes a smooth mouthfeel, and powdered sweetener adds sweetness without using traditional granulated sugar. These ingredients work together to create a creamy mixture suitable for different recipes.
Another advantage is the ability to control the sweetness. Different sugar-free sweeteners have different levels of sweetness, and some leave a noticeable aftertaste. When preparing condensed milk yourself, you can choose the sweetener that best suits your preferences. You can also adjust the amount used to create a milder or sweeter result, depending on how you plan to use the finished mixture.
The cooking process is straightforward and does not require special equipment. A small saucepan, a spoon for stirring, and a suitable storage container are generally all you need. After combining the ingredients, the mixture simmers gently on the stovetop while gradually reducing. Most of the cooking time is hands-off, although regular stirring is important to prevent the cream and butter from sticking to the bottom of the pan.
This recipe is also useful for anyone who enjoys experimenting with homemade desserts. Sugar-free condensed milk can replace traditional sweetened condensed milk in many recipes when the texture and sweetness are suitable. It can be incorporated into chocolate treats, creamy fillings, homemade fudge, and coffee drinks. Having a homemade version available makes it easier to prepare lower-sugar desserts without purchasing a separate specialty product.
Tips for Making the Best Sugar Free Condensed Milk
A few simple techniques can make a noticeable difference in the finished texture and flavor. Although the recipe requires only a handful of ingredients, gentle cooking and careful stirring are important for achieving a smooth result. Paying attention to these details can help prevent common problems and make your homemade condensed milk more consistent.
Stir the Mixture Regularly
Stirring is one of the most important parts of this recipe. Heavy cream contains natural milk solids that can stick to the bottom of a hot saucepan, particularly when the mixture is reducing over an extended period. Stirring regularly helps distribute the heat and prevents the ingredients from settling or scorching.
You do not need to stir continuously, but avoid leaving the saucepan unattended for long periods. Give the mixture a thorough stir, making sure to reach the bottom and corners of the pan. If you notice the mixture bubbling too aggressively, lower the heat immediately.
Choose the Right Sweetener
The sweetener you select can affect both the taste and consistency of homemade condensed milk. Powdered allulose is particularly useful because it dissolves well and is suitable for many low-carb dessert preparations. Other powdered sugar-free sweeteners may also work, but the finished product can vary depending on their composition.
Before making a full batch, consider how the sweetener tastes in other recipes. Some alternatives are sweeter than regular sugar, while others have a noticeable aftertaste. Selecting a sweetener you already enjoy will help you achieve a result that suits your preferences.
Be Patient During Cooling
One common mistake is expecting the condensed milk to become extremely thick while it is still hot. The mixture naturally becomes thicker as it cools, so its stovetop consistency does not always represent the final texture. Removing it from the heat at the appropriate time helps prevent unnecessary overcooking.
After cooking, allow the mixture to cool without rushing the process. Once refrigerated, it should develop a richer and thicker consistency. If it seems slightly loose immediately after cooking, give it time to cool before deciding whether it needs additional cooking.
Try a Caramel-Style Variation
If you enjoy deeper caramel flavors, you can experiment with extending the cooking time until the mixture develops a golden color. A longer simmer can create a more caramel-like flavor and make the condensed milk useful as a dessert topping or sauce.
However, monitor the saucepan carefully when trying this variation. The mixture can become too thick or develop a burnt taste if it cooks for too long. Keep the heat low and stir regularly to maintain an even consistency.
Make a Dairy-Free Version
For a dairy-free alternative, full-fat canned coconut milk or coconut cream can be used instead of heavy cream. Dairy-free butter can replace regular butter, making it possible to prepare a coconut-based version without traditional dairy ingredients.
Keep in mind that coconut products have their own distinctive flavor, so the finished condensed milk will taste different from the cream-based version. Full-fat coconut products are preferable because they provide the richness needed for a thicker result. Check the labels of your chosen products to make sure they are suitable for your dietary requirements.
Delicious Ways to Use Sugar Free Condensed Milk
One of the biggest advantages of keeping homemade sugar-free condensed milk in your refrigerator is how many different recipes can benefit from it. Its creamy consistency and sweetness make it a useful ingredient for everyday treats as well as special desserts. You can use it in recipes that traditionally call for sweetened condensed milk, adjusting the remaining ingredients to suit your preferred level of sweetness.
Add It to Vietnamese Coffee
Vietnamese coffee is traditionally enjoyed with sweetened condensed milk, which balances the strong flavor of brewed coffee. Homemade sugar-free condensed milk offers another option for people who want a lower-sugar version of this popular drink. Add a spoonful to freshly brewed coffee and stir until it blends smoothly.
You can also use it in iced coffee by combining it with chilled coffee and ice. The creamy mixture gives the beverage a pleasant sweetness and richness without requiring regular condensed milk. Adjust the amount according to your taste and the strength of your coffee.
Make Creamy Homemade Fudge
Condensed milk is commonly used in homemade fudge because it helps create a smooth, rich texture. Sugar-free condensed milk can be incorporated into suitable low-carb fudge recipes, particularly those made with chocolate and other keto-friendly ingredients. It provides creaminess and sweetness while helping the ingredients come together.
For a simple dessert idea, combine it with melted sugar-free chocolate according to a suitable fudge recipe. Allow the mixture to set in the refrigerator before cutting it into portions. This creates a convenient treat for chocolate lovers who prefer to reduce their regular sugar intake.
Prepare a Tres Leches Cake
Tres leches cake is known for its soft texture and rich milk mixture. Traditional versions use several types of milk, including sweetened condensed milk. A homemade sugar-free alternative can be useful when adapting this dessert to a lower-sugar eating plan.
Use it as part of a suitable sugar-free milk mixture, making sure the cake recipe is adjusted for the different ingredients. The creamy sweetness helps give the dessert its familiar character while allowing you to prepare a version with less added sugar.
Use It in Homemade Ice Cream
Sugar-free condensed milk can also be incorporated into certain homemade ice cream recipes. Its rich texture and sweetness make it a useful addition to creamy frozen desserts. Combine it with suitable ingredients such as heavy cream, vanilla, cocoa powder, or other flavorings to create different varieties.
The exact freezing results depend on the recipe and sweetener used, so choose an ice cream method designed for sugar-free ingredients. This is a convenient way to experiment with homemade frozen treats without relying on traditional sweetened condensed milk.
How to Store Homemade Sugar Free Condensed Milk
Proper storage helps maintain the flavor and quality of homemade condensed milk. Because this recipe contains cream and butter, it should be refrigerated after cooling rather than left at room temperature. Transfer the cooled mixture into a clean, airtight glass jar or food-safe container and close it securely.
Refrigerating Instructions
Keep the condensed milk in the refrigerator for up to one month, as specified for this recipe. Always use a clean spoon when removing portions to help prevent contamination. Make sure the container is closed properly after every use and returned to the refrigerator promptly.
Before using stored condensed milk, check its appearance, smell, and texture. If you notice an unusual smell, discoloration, mold, or other signs of spoilage, discard it rather than tasting it. Storage time can vary depending on preparation and refrigerator conditions, so use good food-safety practices.
Freezing Instructions
Freezing is another option when you want to prepare a batch in advance. Allow the condensed milk to cool completely, then transfer it into a freezer-safe airtight container. Leave a little space at the top because the mixture may expand slightly as it freezes.
The recipe instructions allow freezing for up to six months. When you are ready to use it, transfer the container to the refrigerator and allow it to thaw overnight. Stir thoroughly after thawing because the texture may separate or change slightly during freezing. Avoid repeatedly freezing and thawing the same batch.
Frequently Asked Questions
Is There Unsweetened Condensed Milk?
Traditional condensed milk is generally available in sweetened and evaporated forms, but these products are not exactly the same. Sweetened condensed milk contains added sugar and has a thick, concentrated consistency. Evaporated milk is concentrated milk without added sugar and is usually thinner. If you want a creamy dessert ingredient without regular sugar, homemade sugar-free condensed milk is a useful alternative.
Is Sugar Free Condensed Milk Keto Friendly?
This recipe is designed as a low-carb alternative to traditional sweetened condensed milk. It uses heavy cream, butter, and powdered sugar-free sweetener instead of regular sugar. The supplied recipe description lists approximately 1 gram of carbohydrates, but the actual carbohydrate count depends on the ingredients, quantities, and serving size. Always check your chosen sweetener and dairy product labels when tracking carbohydrates.
Can I Use Heavy Whipping Cream Instead of Heavy Cream?
Yes. Heavy whipping cream can be used as an alternative when it has a similar fat content. Both products provide the richness needed to create a creamy condensed milk texture. Avoid using low-fat milk or light cream because they may produce a thinner mixture that does not reduce in the same way.
Why Is My Condensed Milk Still Thin After Cooking?
It is normal for the mixture to appear thinner while it is hot. Homemade sugar-free condensed milk thickens considerably as it cools and becomes firmer after refrigeration. Allow it to reach room temperature and chill completely before deciding whether its consistency needs further adjustment.
Can I Use Granulated Sweetener?
Powdered sweetener is recommended because it dissolves more easily and helps create a smoother texture. Granulated sweeteners may leave a grainy consistency if they do not dissolve completely. If you only have a granulated sugar-free alternative, check whether it can be finely powdered before using it.
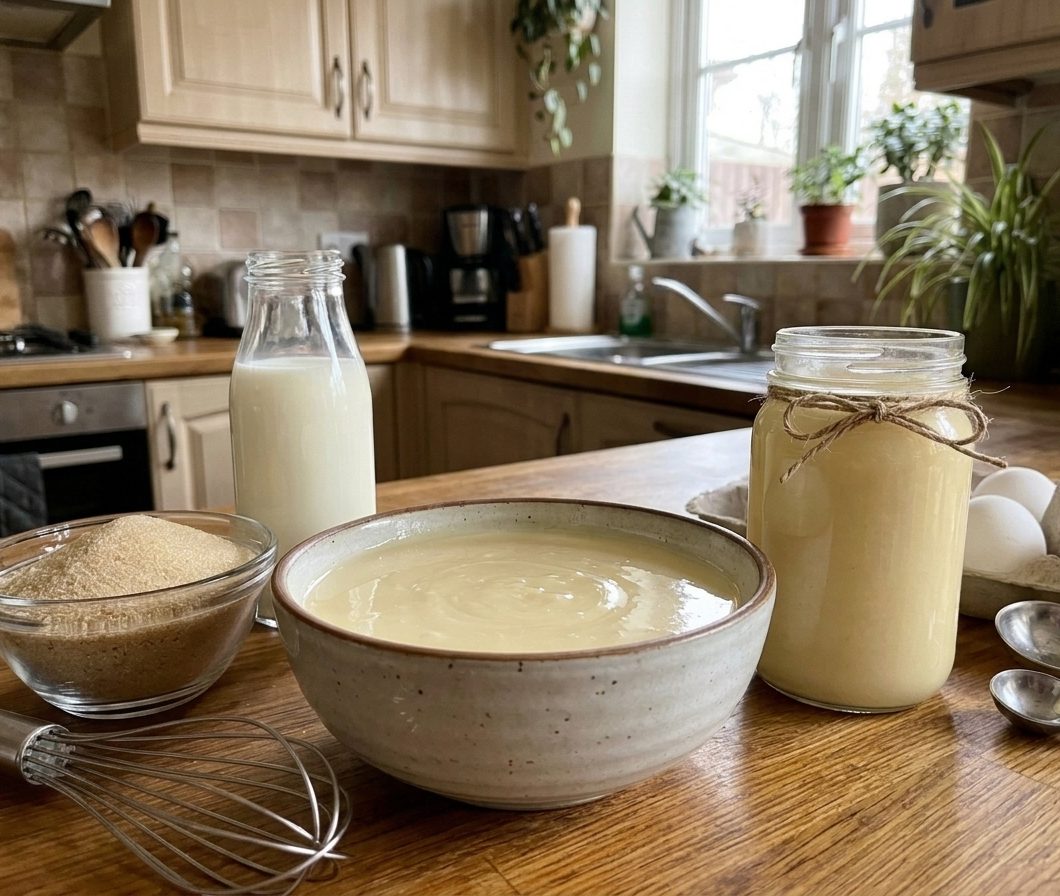
Keto Low-Sugar Condensed Milk
A rich, creamy, and low-carb alternative to traditional condensed milk, perfect for keto desserts, beverages, and baking. Made with simple ingredients and ready in minutes.
20
tablespoons5
minutes10
minutes81
kcal15
minutesIngredients
Heavy cream – 1 cup
Butter – 1/2 cup
Powdered allulose or preferred sugar-free sweetener – 1/2 cup
Salt – a small pinch (optional)
Vanilla extract – 1/2 teaspoon (optional)
Directions
- Pour the heavy cream into a medium-sized saucepan and add the butter. Place over medium heat and bring the mixture to a gentle boil. Add a pinch of salt if desired. Stir continuously for about 5 minutes, ensuring the mixture does not overflow.
- Gradually whisk in the powdered sweetener until fully dissolved. Continue stirring while allowing the mixture to simmer for around 10 minutes, or until it thickens and coats the back of a spoon.
- Remove the saucepan from heat and stir in the vanilla extract if using. Let the mixture cool completely; it will thicken further as it cools.
- Transfer to a glass jar or airtight container if not using immediately. Store in the refrigerator. Reheat gently for about 30 seconds and whisk well if separation occurs.
Nutrition Facts
- Calories: 81kcal
- Fat: 9g
- Carbohydrates: 1g
- Sugar: 1g
- Protein: 1g


