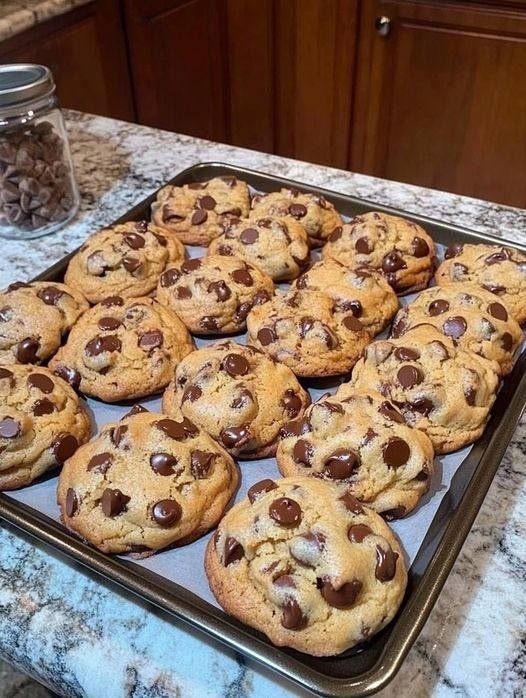
These sourdough discard chocolate cookies start off like a classic chocolate cookie but carry a small difference that changes the final result in a noticeable way. The usual base of flour, cocoa, butter, sugar, and egg is still there, but the addition of sourdough discard brings a gentle tang and a deeper, more rounded flavor.
The dough comes together easily in one bowl for the wet ingredients and another for the dry, and it bakes into cookies that are soft in the center with lightly crisp edges. They are not overly complicated, but they do benefit from a bit of patience, especially during chilling, which helps the texture and flavor settle properly.
What makes these cookies enjoyable is how balanced they are. They are rich but not heavy, sweet but not overwhelming, and the sourdough discard quietly lifts the chocolate flavor without taking over.
The Role of Sourdough Discard in Cookies
Sourdough discard is not used here for rising like bread. Instead, it works more as a flavor enhancer and texture softener. Because it is unfed starter, it carries a mild tang that balances the sweetness of the sugars.
It also adds a bit of moisture, which helps keep the cookies soft in the center even after baking. Once mixed into the dough, it blends smoothly and disappears into the chocolate base, leaving only a subtle depth in taste.
It is one of those ingredients that doesn’t shout for attention but still changes the overall result in a quiet, meaningful way.
Building the Cookie Base
The process starts by creaming softened butter with brown sugar and white sugar. This step is important because it creates the foundation for the cookie’s texture. The mixture becomes smooth, slightly fluffy, and well blended when done properly.
Brown sugar adds moisture and a deeper caramel-like taste, while white sugar helps with structure and gives a slight crispness at the edges once baked. Together, they create a balanced sweetness that supports the cocoa powder added later.
At this stage, the mixture should feel soft and creamy, not grainy.
Adding Egg, Vanilla, and Sourdough Discard
Next comes the egg and vanilla extract. The egg helps bind everything together and gives the dough structure, while vanilla enhances the chocolate flavor without overpowering it.
Once these are mixed in, the sourdough discard is added. At first, the mixture may look slightly uneven, but with gentle mixing it becomes smooth again. This step is where the dough starts to take on its final identity, slightly thick, rich, and glossy.
The batter at this point already has a deep chocolate aroma with a faint tang underneath.
Dry Ingredients and Chocolate Base
In a separate bowl, flour, cocoa powder, baking soda, and salt are combined. Mixing them separately ensures that the cocoa is evenly distributed and that there are no dry pockets in the final dough.
Cocoa powder especially needs proper mixing because it tends to clump. Salt is also important here because it sharpens the chocolate flavor and balances the sweetness from the sugars.
Once mixed, the dry ingredients are ready to be added into the wet mixture.
Forming the Dough
The dry mixture is slowly added into the wet ingredients. As it comes together, the dough becomes thick and rich, almost like a soft chocolate paste.
It is important not to overmix at this stage. The goal is just to bring everything together until no dry flour is visible. Overmixing can make the cookies tougher instead of soft and tender.
Once combined, the dough should be thick enough to scoop but still soft and pliable.
Adding Chocolate and Optional Texture
Chocolate chips or chopped chocolate are folded into the dough at this stage. This is where the cookies become even richer, as the chocolate melts slightly during baking and creates pockets of gooey texture.
Nuts can also be added if a bit of crunch is preferred. They give contrast to the soft cookie base and work well with the chocolate flavor.
Everything is folded gently so the dough stays intact and the mix-ins are evenly spread.
Why Chilling the Dough Matters
The dough is then covered and placed in the refrigerator. This step is important because it helps control how the cookies spread during baking.
Chilling solidifies the butter slightly, which means the cookies hold their shape better in the oven. It also allows the flour to fully hydrate, which improves texture and deepens flavor.
Even a short chilling time makes a difference, but longer resting gives a richer taste and better structure.
Shaping the Cookies
Once chilled, the dough is scooped and rolled into small balls. They are placed on a baking tray lined with parchment paper, with enough space between each one to allow spreading.
The dough should feel firm but still easy to shape. If it feels too hard from chilling, letting it sit for a few minutes at room temperature helps.
Each cookie should be similar in size so they bake evenly.
Baking to the Right Point
The cookies are baked in a preheated oven until the edges are set but the center still looks slightly soft. This is the stage that creates a chewy middle once they cool.
It is better to slightly underbake than overbake, because the cookies continue to firm up on the tray after coming out of the oven.
At this point, they may look soft in the center, but they will set as they cool.
Cooling and Final Texture
After baking, the cookies are left on the tray for a few minutes before being moved to a cooling rack. This resting time allows them to firm up enough to handle without breaking.
As they cool, the texture settles into soft centers with slightly crisp edges. The chocolate flavor also becomes more pronounced once they are no longer hot.
They can be enjoyed warm for a soft, gooey bite or cooled for a more structured cookie.
Small Details That Make a Difference
A few simple habits improve the final result noticeably. Using softened butter helps the mixture cream properly and creates a smoother dough. Chilling the dough prevents spreading and improves flavor development. Slightly underbaking keeps the cookies soft and fudgy, while a bit longer in the oven gives a firmer texture.
These small adjustments allow the cookies to be tailored to personal preference without changing the recipe itself.
A Rich Cookie Worth Making Again
These sourdough discard chocolate cookies are simple to prepare but deliver a deep, rich flavor with a soft texture that makes them stand out. The sourdough discard adds subtle complexity, while the chocolate base keeps them familiar and comforting.
They work well as an everyday bake and are especially good when served warm, when the chocolate is still slightly soft and the centers are tender.
Recipe Card – Sourdough Discard Chocolate Cookies
Description
Soft, rich chocolate cookies made with sourdough discard for a mild tang and deeper flavor. Chewy centers with lightly crisp edges and loaded with chocolate.
Duration
Prep Time: 15 minutes
Chill Time: 30 minutes to 12 hours
Bake Time: 10–12 minutes
Cooling Time: 10 minutes
Total Time: 1 hour to overnight (including chilling)
Ingredients
Dry Ingredients
1 ½ cups all-purpose flour
½ cup cocoa powder
½ teaspoon baking soda
½ teaspoon salt
Wet Ingredients
½ cup sourdough discard (unfed starter)
½ cup butter (softened)
¾ cup brown sugar
¼ cup white sugar
1 large egg
1 teaspoon vanilla extract
Optional Add-ins
½ to 1 cup chocolate chips or chopped chocolate
½ cup chopped nuts
Instructions
- Cream butter, brown sugar, and white sugar until smooth and slightly fluffy.
- Add egg and vanilla extract and mix until combined.
- Mix in sourdough discard until fully incorporated.
- In a separate bowl, combine flour, cocoa powder, baking soda, and salt.
- Gradually add dry ingredients into wet mixture and mix until dough forms.
- Fold in chocolate chips or nuts if using.
- Cover dough and chill for at least 30 minutes or up to 12 hours.
- Preheat oven to 180°C and line a baking tray with parchment paper.
- Shape dough into balls and place on tray with space between each.
- Bake for 10–12 minutes until edges are set and centers are soft.
- Let cookies rest on tray for 5 minutes, then transfer to a cooling rack.
- Serve warm or at room temperature.
Notes
Do not skip chilling as it helps control spreading and improves flavor
Softened butter helps create a smoother dough
Slightly underbaking keeps cookies soft and fudgy
Baking longer results in crispier cookies


