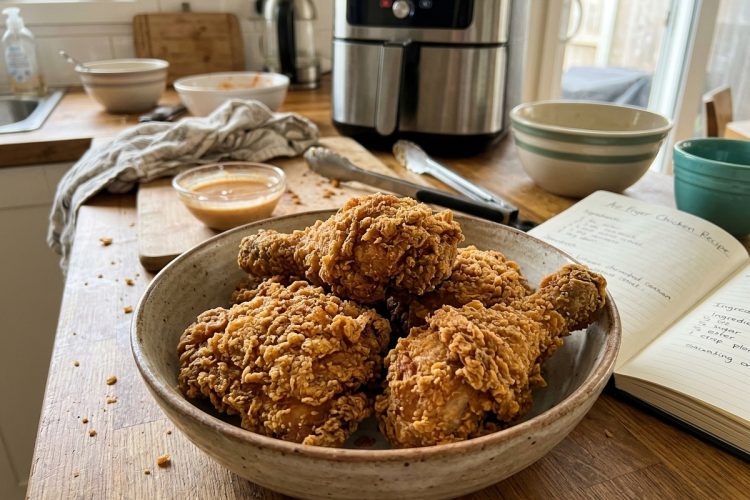
Air Fryer KFC Chicken is a delicious homemade alternative to traditional fried chicken, bringing together juicy chicken pieces, a flavorful seasoning blend, and a wonderfully crunchy breadcrumb coating. This easy air fryer recipe allows you to enjoy the familiar taste and texture of Kentucky Fried Chicken-style meals without filling a deep pan with cooking oil.
Each piece is coated in seasoned flour, dipped in beaten eggs, and finished with spiced breadcrumbs before being cooked until golden and crisp. It is a satisfying choice for family dinners, weekend lunches, or whenever you want homemade crispy chicken.
Preparing crispy chicken in an air fryer also makes the cooking process more manageable. Instead of dealing with large amounts of hot oil, you can arrange the coated chicken in the air fryer basket and let the circulating heat cook the outside. A small amount of olive oil spray can be used when needed to encourage browning. The result is a flavorful chicken dish with a crunchy exterior and tender interior, making it a convenient option for anyone who enjoys classic fried chicken flavors at home.
Why Make KFC-Style Chicken in an Air Fryer?
Homemade KFC-style chicken is easier to prepare when you use an air fryer because you do not need a deep fryer or a large quantity of cooking oil. Traditional fried chicken usually requires careful temperature control and enough oil to cover the chicken pieces. With an air fryer, the preparation is simpler: coat the chicken, place it in the basket, and allow the appliance to cook it using circulating hot air. This makes the recipe particularly useful for everyday cooking.
Another reason to try this method is the balance between convenience and texture. The seasoned breadcrumb coating develops a golden surface as the chicken cooks, while the inside remains juicy when properly prepared. You can also cook the chicken in smaller batches, which makes it easier to manage different pieces. Whether you are making dinner for your family or preparing a platter for guests, air fryer chicken offers a practical way to enjoy a familiar favorite.
What Gives Homemade KFC Chicken Its Flavor?
The seasoning is one of the most important parts of recreating a Kentucky Fried Chicken-inspired taste. Rather than adding all the spices to one bowl, this recipe distributes the KFC spice blend across different stages of preparation. Some seasoning is mixed directly with the chicken, while additional flavor is added to the flour and breadcrumbs. This approach helps create a more flavorful coating and ensures that the chicken does not depend entirely on its outer layer for taste.
The combination of seasoned flour, eggs, and breadcrumbs also contributes to the finished result. Flour creates the first coating, beaten eggs help the next layer stick, and seasoned breadcrumbs provide the crunchy finish. Salt, pepper, chicken seasoning, and the KFC spice blend work together to give the coating a savory flavor. When each layer is prepared properly, the chicken develops a deliciously seasoned crust that makes this homemade version enjoyable.
How to Choose and Prepare the Chicken
Selecting the Best Chicken Pieces
This recipe uses two small whole chickens, separated into individual portions such as drumsticks, thighs, wings, and breasts. Using whole chickens gives you a combination of different cuts, which is helpful when serving several people with different preferences. Some family members may prefer smaller wings, while others might choose a juicy thigh or a larger breast portion. Having several cuts also makes the finished chicken platter look more varied and suitable for sharing.
If preparing whole chickens is inconvenient, ready-cut chicken pieces are another option. You can purchase a selection of drumsticks, thighs, wings, and breasts from your local butcher or grocery store. Try to select pieces that are reasonably similar in size so they are easier to arrange and cook in batches. Keep in mind that thicker pieces may need more cooking time than smaller portions, so checking each piece before serving is important.
Preparing the Chicken Before Coating
Start by dividing the whole chickens into separate portions if they have not already been cut. Arrange the drumsticks, thighs, wings, and breast pieces on a clean preparation surface. Pat the chicken dry with paper towels before adding the seasoning. Removing excess moisture helps the coating adhere more effectively and makes the breading process easier. Prepare all the pieces before moving on to the flour, egg, and breadcrumb mixtures.
It is helpful to organize the ingredients before beginning because the breading process involves several separate steps. Place the chicken in one area and prepare the bowls for seasoned flour, beaten eggs, and breadcrumbs nearby. Once everything is ready, you can move each piece through the coating stages without unnecessary interruptions. This simple preparation method also helps keep the kitchen organized and makes cooking a larger quantity of chicken less stressful.
Prepare the Three-Part Breading Mixture
Make the Seasoned Flour
Choose a wide bowl that gives you enough room to turn the chicken pieces without spilling the flour. Add the plain flour, chicken seasoning, salt, and black pepper, then mix everything thoroughly. The purpose of this first coating is to cover the chicken with a light layer that helps the egg mixture attach to its surface. Mixing the seasonings evenly is important because it prevents some pieces from receiving too much flavor while others remain underseasoned.
Before using the flour mixture, break up any small lumps and make sure the ingredients are evenly combined. A wide, shallow bowl is generally more convenient than a narrow container because larger chicken pieces can be turned more easily. When the chicken is dipped into the flour, coat every side and gently shake off any excess. A thin, even layer works better than a thick coating that may become uneven during the remaining breading steps.
Beat the Eggs
Crack four large eggs into a separate bowl and beat them with a fork until the yolks and whites are fully blended. The eggs create the middle layer between the seasoned flour and breadcrumbs. After the chicken has been coated in flour, dipping it into the beaten eggs gives the surface enough moisture for the breadcrumbs to attach. Without this layer, the final coating may not stick properly and can leave uncovered areas on the chicken.
Use a bowl that is large enough to hold the chicken pieces comfortably. Turn each floured piece through the egg mixture so the entire surface becomes coated. Allow any excess egg to drip back into the bowl before transferring the chicken to the breadcrumbs. Taking a little time during this step helps create an even outer crust and reduces the chance of loose breadcrumbs falling away while the chicken cooks in the air fryer.
Season the Breadcrumbs
Place the breadcrumbs in another clean bowl and mix them with the designated portion of KFC spice blend. Stir thoroughly so the seasoning is spread throughout the breadcrumbs rather than remaining in one spot. This mixture forms the outer layer of the chicken and is responsible for much of its crunchy texture. Seasoning the breadcrumbs also gives the finished coating a more appealing savory flavor with every bite.
Choose a container that is wide enough to coat the chicken without crushing the breadcrumb mixture. When you add each egg-coated piece, turn it gently and press the breadcrumbs against the surface. This helps the crumbs attach evenly and creates a fuller coating. Prepare the breadcrumb mixture before handling the chicken so that the entire breading station is ready when you begin. Keeping the three bowls arranged in order makes the process easier to follow.
How to Coat the Chicken for a Crispy Finish
Add the First Layer of Seasoning
Before using the flour mixture, place the prepared chicken pieces in a suitable bowl and toss them with half of the KFC spice blend. Turn the pieces gently until the seasoning is distributed over their surfaces. This step gives the chicken flavor beneath the breadcrumb coating, rather than relying only on the outside crust. Even seasoning is especially important when preparing a mixture of wings, thighs, drumsticks, and breast portions.
Avoid adding the seasoning to just one side of the chicken. Take a moment to turn the pieces so the spice blend reaches different areas. Once everything is coated, move directly to the flour stage. Preparing the chicken in this order helps the flavors build gradually and gives every portion a consistent taste. It also makes the finished homemade chicken more satisfying because the seasoning is present throughout the coating process.
Coat Each Piece in Flour and Egg
Take one seasoned chicken piece and place it into the prepared flour mixture. Turn it carefully until all sides are covered, paying attention to areas around the joints and uneven surfaces. Shake off the loose flour before dipping the piece into the beaten eggs. The flour layer creates a dry base, while the egg mixture provides the slightly sticky surface needed for the breadcrumbs to stay attached.
After dipping the chicken into the eggs, turn it until the entire floured surface is covered. Let the extra egg drip away before moving to the next bowl. Working with one piece at a time helps you maintain an even coating and prevents the bowls from becoming unnecessarily messy. Repeat the same process for the remaining chicken pieces, following the flour stage with the egg mixture every time.
Apply the Seasoned Breadcrumbs
Transfer the egg-coated chicken into the seasoned breadcrumbs. Turn the piece carefully and press the crumbs against its surface so they cover as much of the chicken as possible. Pay attention to the sides and thicker areas because these sections can sometimes be missed during breading. A consistent coating helps create a more attractive golden crust and improves the overall texture after the chicken has been air fried.
Once a piece is completely covered, place it on a clean plate or tray while you prepare the remaining portions. Continue using the same flour, egg, and breadcrumb sequence until all the chicken is coated. Try not to stack the prepared pieces tightly because the breading can become disturbed. Keeping the coated chicken arranged in a single layer also makes it easier to transfer the pieces into the air fryer basket.
Cooking KFC Chicken in the Air Fryer
Arrange the Chicken in the Basket
Before cooking, make sure the air fryer basket is clean and ready for the breaded chicken. Arrange the pieces in one layer, leaving some space between them so hot air can move around the surfaces. Avoid placing chicken pieces directly on top of one another because overlapping can interfere with even cooking. A crowded basket may also cause the breadcrumb coating to become less crisp in areas where moisture collects.
If you are preparing both chickens, you may need to cook the pieces in multiple batches. This is completely normal and often produces a better result than trying to fit everything into one cooking round. Arrange the pieces according to their size when possible, and leave enough room to turn them during cooking. Good spacing helps the air fryer work more effectively and gives the coating a better opportunity to develop an even golden finish.
Follow the Recipe’s Cooking Temperature and Time
Cook the breaded chicken at 180°C (360°F) for 12 minutes. When the first cooking period is complete, carefully turn the chicken pieces over and return them to the air fryer for another 4 minutes at the same temperature. This gives a total stated cooking time of 16 minutes. Turning the chicken allows the other side to receive direct exposure to the circulating hot air and helps the coating brown more evenly.
However, cooking time can change depending on the size and thickness of the chicken pieces and the particular air fryer being used. Bone-in breast portions and larger thighs may require additional cooking compared with smaller wings. Always check the thickest part of the chicken with a food thermometer and make sure it reaches an internal temperature of 74°C (165°F) before serving. Continue cooking when necessary rather than relying on the timer alone.
Tips for Making Extra Crispy Air Fryer KFC Chicken
Use Olive Oil Spray When Necessary
Air frying requires much less oil than traditional deep frying, but a small amount of olive oil spray can help improve the appearance of the breadcrumb coating. If the surface looks dry or you want a more noticeable golden finish, lightly spray the chicken with extra virgin olive oil during the cooking process. Use only a little because too much oil can make the breadcrumbs heavy instead of allowing them to develop a crisp texture.
The breadcrumb mixture already provides the base for the crunchy exterior, so additional oil is not always necessary. Check the chicken as it cooks and decide whether a light spray would be helpful. Avoid soaking the coating or applying a heavy amount of oil. A gentle, even application is generally sufficient when you want to encourage browning without losing the lighter cooking advantage of the air fryer.
Leave Enough Space Between the Pieces
One of the most important details when air frying breaded chicken is avoiding an overcrowded basket. Hot air needs room to circulate around the chicken, and tightly packed pieces can prevent the coating from cooking evenly. When chicken is placed too close together, moisture can collect between the pieces and affect the texture of the breadcrumbs. Leaving small gaps helps the outside become more evenly cooked and crisp.
If the basket is not large enough for all the chicken, prepare the recipe in several rounds. Although cooking in batches requires a little extra time, it gives you more control over the finished texture. It also makes turning the chicken easier because you have enough room to handle each piece safely. For the best result, focus on arranging the chicken properly instead of trying to finish the entire quantity in one batch.
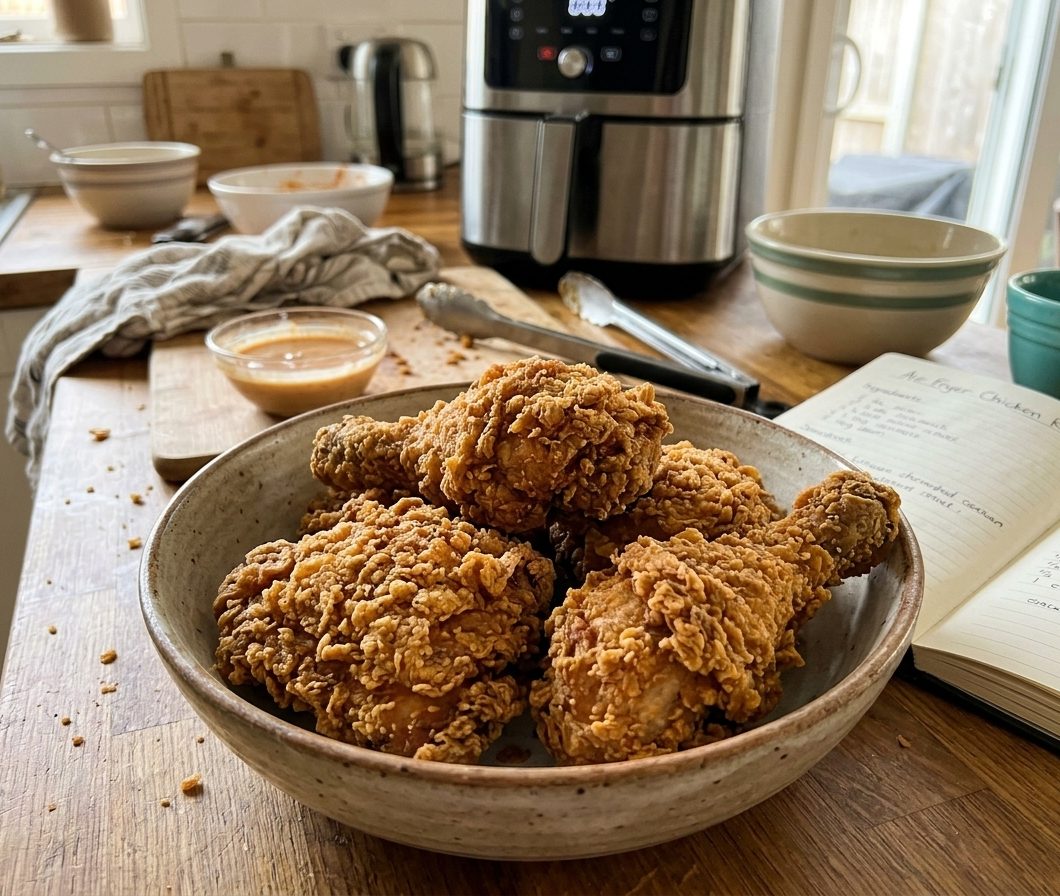
Air Fryer KFC Chicken
A healthier take on classic fried chicken, this air fryer KFC-style chicken is crispy on the outside and juicy on the inside.
15
minutes20
minutes35
minutesIngredients
474 ml buttermilk
4 boneless chicken thighs (skin on)
4 chicken legs (bone-in, skin on)
1 1/4 cups all-purpose flour
1/2 cup potato starch
2 1/2 tsp smoked paprika
1 1/2 tsp garlic powder
1 tsp chili powder
1 tsp onion powder
1 1/2 tsp mustard powder
1 tsp thyme (dried)
1 tsp oregano (dried)
1 1/4 tsp white pepper
2 tsp kosher salt
2 tsp nutritional yeast (optional)
avocado oil spray
flaky salt (for topping)
Directions
- In a large bowl, pour in the buttermilk and add the chicken pieces. Cover and refrigerate overnight for best results.
- In a separate bowl, combine the flour with all spices, salt, and optional nutritional yeast. Mix well.
- Remove the chicken from the marinade and add about 1/4 cup of the buttermilk into the flour mixture. Stir to create small clumps.
- Preheat the air fryer. Start with the chicken legs by coating them thoroughly in the flour mixture and shaking off excess.
- Place the legs in the air fryer basket, spray with oil, and cook at 370°F for 22–24 minutes. Check halfway and spray any dry spots. Do not flip.
- Transfer cooked legs to a wire rack and sprinkle with topping. Keep warm in a low oven if needed.
- Repeat the coating process with the chicken thighs. Cook at 350°F for 15 minutes, checking halfway through.
- Increase the temperature to 360°F and cook for an additional 4–5 minutes until crispy and golden.
- Remove, sprinkle with topping, and serve immediately.
Notes
- You don’t need to flip the chicken while it cooks, as turning it can cause some of the coating to come off and reduce the overall crispiness. Keeping it on one side helps maintain a better, crunchier texture.


