Yield
8 large triangular scones
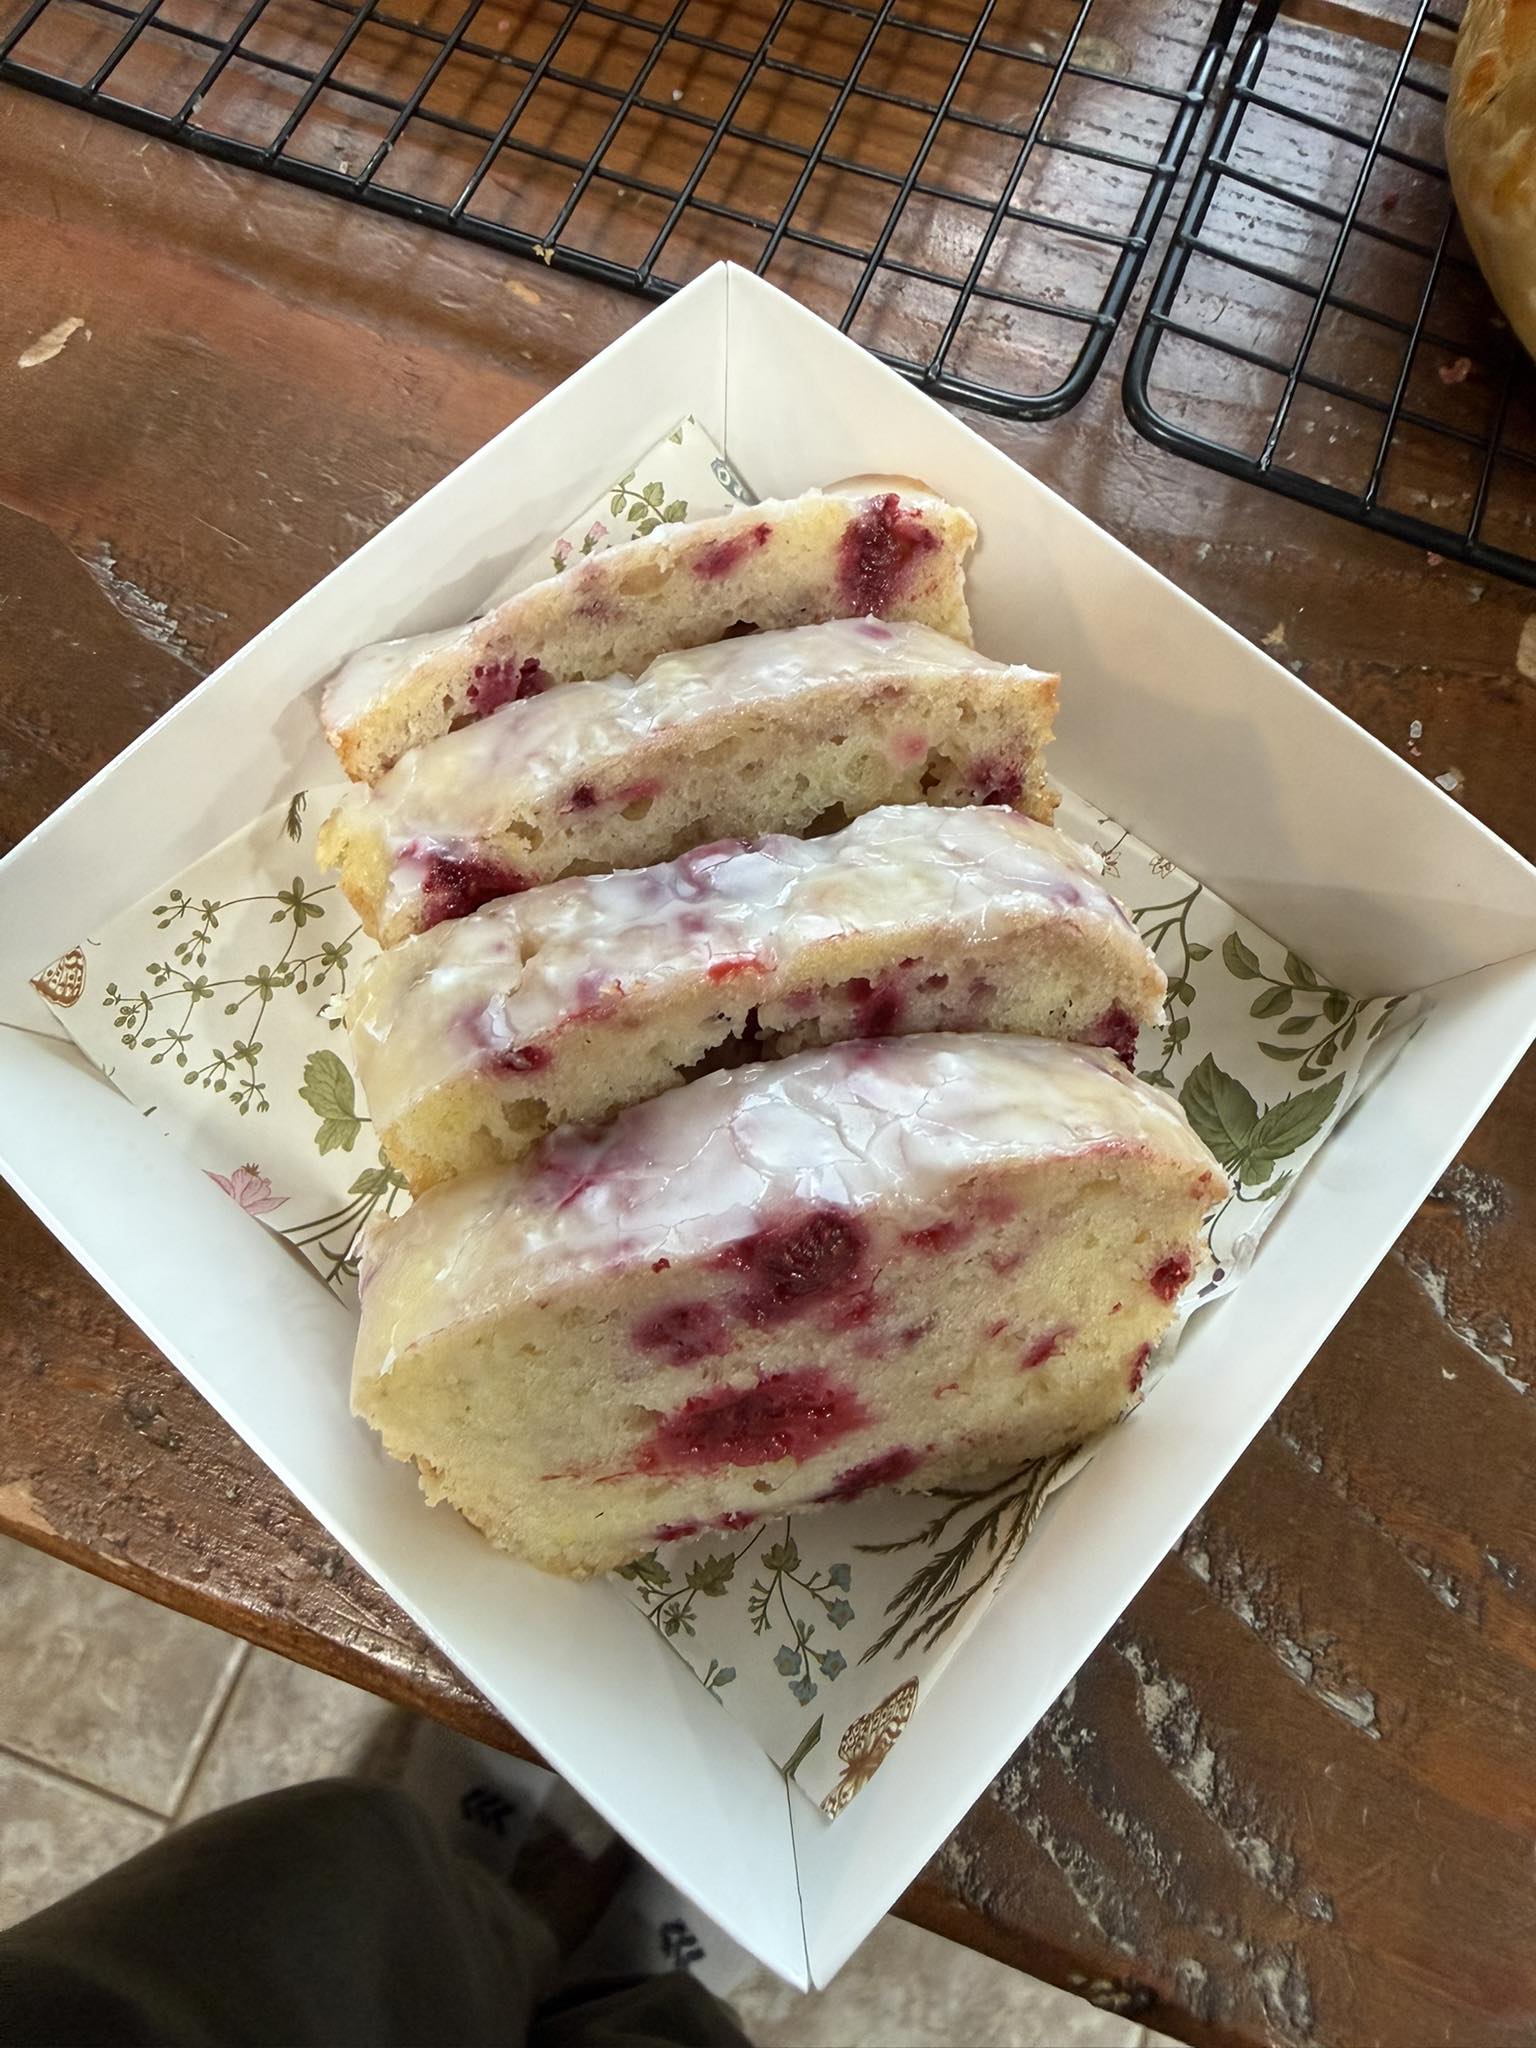
Texture and Flavor
These scones are:
- Soft and buttery inside
- Lightly crisp on the outside
- Filled with juicy raspberry pockets
- Finished with a smooth vanilla glaze
- Slightly dense like bakery café scones
- Moist enough to stay tender the next day
The recipe below is designed to closely match the appearance and texture in your photo.
Ingredients
For the Scones
Dry Ingredients
- 3 cups all-purpose flour
- 1/2 cup granulated sugar
- 1 tablespoon baking powder
- 1/2 teaspoon baking soda
- 3/4 teaspoon salt
Cold Butter
- 3/4 cup unsalted butter, very cold and cubed
Wet Ingredients
- 2 large eggs
- 3/4 cup heavy cream
- 1/4 cup sour cream or plain Greek yogurt
- 2 teaspoons vanilla extract
- 1 teaspoon almond extract (optional but excellent with raspberries)
Fruit
- 1 1/2 cups raspberries
Fresh raspberries work beautifully, but frozen raspberries are often easier because they hold their shape better while mixing.
If using frozen raspberries:
- Do not thaw them
- Toss them lightly in 1 tablespoon flour before folding in
Vanilla Raspberry Glaze
- 2 cups powdered sugar
- 3 to 4 tablespoons milk or cream
- 1 teaspoon vanilla extract
- 1 tablespoon raspberry puree or jam (optional for pink streaks)
- Tiny pinch of salt
Equipment
- Mixing bowls
- Pastry cutter or fork
- Bench scraper or knife
- Baking sheet
- Parchment paper
- Cooling rack
Step 1: Prepare the Baking Sheet
Preheat oven to:
- 400°F (204°C)
Line a baking tray with parchment paper.
Cold dough hitting a hot oven is extremely important for tall, fluffy scones.
Step 2: Mix the Dry Ingredients
In a large bowl combine:
- Flour
- Sugar
- Baking powder
- Baking soda
- Salt
Whisk thoroughly so the leavening agents distribute evenly.
This prevents uneven rising or bitter spots.
Step 3: Cut in the Butter
Add the cold cubed butter.
Using:
- a pastry cutter
- two forks
- or your fingertips
work the butter into the flour until the mixture resembles coarse crumbs.
You want:
- pea-sized butter pieces throughout the dough
These butter pockets melt during baking and create tenderness and flaky layers.
Do not overmix.
Warm butter produces dense scones.
Step 4: Mix the Wet Ingredients
In a separate bowl whisk together:
- eggs
- heavy cream
- sour cream
- vanilla extract
- almond extract
Whisk until smooth.
The sour cream adds moisture and softness while the cream provides richness.
Step 5: Combine Wet and Dry
Pour the wet ingredients into the flour mixture.
Use a wooden spoon or spatula to gently combine.
The dough should look:
- shaggy
- slightly sticky
- and uneven
Do not knead heavily.
Overworking develops gluten and creates tough scones.
Step 6: Fold in the Raspberries
Very gently fold in the raspberries.
Some berries will break slightly and streak the dough pink. That is exactly what creates the beautiful bakery appearance seen in your image.
Do not aggressively stir.
A few crushed berries are good. Completely mashed berries are not.
Step 7: Shape the Dough
Lightly flour your counter.
Turn out the dough and gently press it into:
- one large circle
- about 1 1/2 inches thick
Do not use a rolling pin.
Patting by hand keeps the texture softer.
Cut into:
- 8 wedges
For extra-thick bakery scones, make 6 instead of 8.
Step 8: Chill Before Baking
Place the cut scones onto the baking sheet.
Freeze or refrigerate for:
- 15 to 20 minutes
This step is one of the biggest secrets to tall bakery scones.
Cold butter + hot oven = fluffy texture.
Step 9: Bake
Bake at:
- 400°F
For:
- 18 to 24 minutes
until:
- tops are lightly golden
- edges are set
- and centers are fully baked
Because raspberries release moisture, baking time may vary slightly.
The bottoms should be lightly golden.
Do not overbake or they become dry.
Step 10: Cool Slightly
Allow the scones to cool:
- 10 to 15 minutes
before glazing.
If they are too hot, the glaze melts completely off.
Warm—not hot—is perfect.
Step 11: Make the Glaze
In a bowl whisk together:
- powdered sugar
- milk or cream
- vanilla
- pinch of salt
For the raspberry streak effect:
- swirl in raspberry puree or jam lightly
- do not fully mix
The glaze should be:
- thick
- smooth
- and pourable
If too thin:
- add more powdered sugar
If too thick:
- add milk 1 teaspoon at a time
Step 12: Glaze the Scones
Spoon glaze generously over the tops.
Allow it to naturally drip down the sides.
For the exact bakery look:
- apply a fairly thick layer
- let it set at room temperature for 20–30 minutes
The glaze will become soft-set and slightly shiny.
Important Baking Tips
1. Keep Everything Cold
Cold ingredients are essential.
Especially:
- butter
- cream
- raspberries
Warm dough spreads too much.
2. Do Not Overmix
This is the most common mistake.
The dough should look rough and imperfect before baking.
3. Frozen Raspberries Often Work Better
Fresh raspberries can collapse quickly.
Frozen berries:
- bleed less
- hold shape better
- and create prettier pockets
4. Thick Dough Makes Better Scones
Thin dough produces flat pastries.
Keep the dough tall before cutting.
5. Use Heavy Cream
Milk alone will not create the same rich bakery texture.
Optional Variations
Lemon Raspberry
Add:
- 1 tablespoon lemon zest
to the dough.
Then add lemon juice to the glaze.
White Chocolate Raspberry
Fold in:
- 3/4 cup white chocolate chips
with the berries.
Almond Raspberry
Increase almond extract slightly and top with sliced almonds before baking.
Cream Cheese Filled
Add a small cube of sweetened cream cheese in the center of each scone before shaping.
Storage
Room Temperature
Store covered:
- up to 2 days
Refrigerator
Store:
- up to 5 days
Warm slightly before serving.
Freezing Instructions
Freeze Unbaked
After cutting:
- freeze solid on tray
- transfer to freezer bag
Bake directly from frozen:
- add 3–5 extra minutes
Freeze Baked
Freeze without glaze for best texture.
Serving Ideas
These pair especially well with:
- coffee
- vanilla latte
- black tea
- raspberry tea
- lemon tea
They are best served:
- slightly warm
- with fresh glaze
- the same day they are baked
That combination creates:
- soft centers
- defined berry pockets


