Honey Glazed Chicken
A Simple Chicken Dinner with a Sweet and Savory Finish
Some recipes earn a permanent place in the dinner rotation because they are dependable, flavorful, and easy to prepare. Honey Glazed Chicken is one of those meals that brings together everyday pantry ingredients and turns them into a comforting dish that tastes like it required much more effort than it actually did. A quick honey glaze made with soy sauce, mustard, garlic, and a splash of vinegar coats the chicken with a rich, glossy finish that is sweet, savory, and perfectly balanced.
This recipe is ideal for evenings when time is limited but a homemade meal is still the goal. The preparation is straightforward, the cooking time is short, and the ingredients are commonly found in most kitchens. Once everything is ready, the chicken develops a beautifully golden exterior while the glaze thickens into a sticky coating that clings to every piece.
The finished dish pairs well with almost any side, making it a practical choice for both family dinners and meal preparation. Whether served with fluffy rice, roasted vegetables, creamy mashed potatoes, or a crisp salad, it delivers satisfying flavor without requiring complicated cooking techniques.
Why This Recipe Works
The secret to this recipe is the balance of flavors. Each ingredient has an important role, creating a glaze that is rich without becoming overpowering.
Honey provides natural sweetness while helping the sauce caramelize gently as it cooks. Soy sauce contributes saltiness and deep umami flavor that balances the sweetness. Mustard introduces a mild tang that prevents the glaze from tasting overly sugary, while fresh garlic adds warmth and aroma throughout the sauce. A small amount of apple cider vinegar brightens the glaze, giving it just enough acidity to create a well-rounded finish.
Instead of relying on many seasonings or specialty ingredients, this recipe proves that a handful of simple pantry staples can produce impressive results.
What Makes This Recipe a Great Choice
One of the biggest advantages of Honey Glazed Chicken is its versatility. It works equally well as a quick weekday dinner or as part of a meal served to guests.
Some of the reasons this recipe stands out include:
- Ready in about 30 minutes.
- Uses everyday pantry ingredients.
- Easy enough for beginner cooks.
- Suitable for meal prep.
- Pairs well with numerous side dishes.
- Sweet and savory flavors appeal to both adults and children.
- Easy to customize with additional herbs or spices.
Because the glaze comes together in minutes, most of the cooking time is spent allowing the chicken to develop a golden crust before being coated in the sauce.
Choosing the Best Chicken
Boneless, skinless chicken breasts are an excellent choice because they cook quickly and absorb the glaze beautifully. They also slice easily for serving over rice, salads, or noodles.
Chicken thighs can be substituted without changing the recipe. They contain slightly more fat, producing an even juicier result while remaining tender during cooking.
Whichever cut is chosen, selecting pieces of similar thickness helps ensure even cooking.
Understanding the Honey Glaze
Although the ingredient list is short, every component contributes to the final flavor.
Honey is responsible for the rich sweetness and glossy appearance. As it warms in the skillet, it begins to caramelize, giving the chicken its signature sticky coating.
Soy sauce balances the sweetness by adding saltiness and depth. Its savory character keeps the glaze from becoming overly sweet while enhancing the natural flavor of the chicken.
Mustard introduces gentle acidity that brightens the sauce without overpowering it. Dijon mustard provides a slightly richer flavor, while yellow mustard creates a lighter, more familiar taste.
Fresh garlic rounds out the glaze with a pleasant aroma that develops further as it cooks.
Apple cider vinegar, while optional, adds freshness and prevents the glaze from tasting heavy.
If desired, red chili flakes can be added for a mild kick of heat that complements the sweetness of the honey.
Preparing the Chicken
Good preparation makes a noticeable difference in the finished dish.
Remove the chicken from the refrigerator about 10 to 15 minutes before cooking. Allowing it to sit briefly at room temperature promotes more even cooking.
Pat each piece completely dry using paper towels. Moisture on the surface creates steam when the chicken meets the hot skillet, making it difficult to achieve a golden crust.
Once dry, season both sides generously with salt and black pepper. Even though the glaze contains plenty of flavor, seasoning the chicken beforehand creates a stronger overall taste and helps every bite remain well balanced.
Allow the seasoned chicken to rest while preparing the glaze. This short resting time gives the seasoning a chance to adhere to the surface before cooking begins.
Mixing the Honey Glaze
The glaze comes together in only a few minutes.
In a medium bowl, combine the honey, soy sauce, mustard, minced garlic, apple cider vinegar, black pepper, and red chili flakes if using.
Whisk until smooth and fully blended.
At this stage, the mixture will appear thin, but once heated in the skillet it naturally reduces into a thick, glossy sauce that coats the chicken beautifully.
Preparing the glaze before heating the skillet allows everything to move quickly once cooking begins.
Cooking the Chicken
Heat a large skillet over medium heat before adding the olive oil.
Once the oil begins to shimmer, carefully place the chicken into the pan in a single layer.
Avoid overcrowding the skillet. If necessary, cook the chicken in batches. Giving each piece enough space allows proper browning instead of steaming.
Cook without moving the chicken for about 4 to 5 minutes. Leaving it undisturbed helps develop a rich golden crust that adds both flavor and texture.
Flip each piece and continue cooking for another 4 to 5 minutes.
Depending on thickness, larger chicken breasts may require slightly longer. At this stage, the chicken should be nearly cooked through before the glaze is added.
The golden exterior created during this step becomes the perfect base for the sticky sauce.
Finishing with the Glaze
Lower the heat slightly before pouring the prepared glaze into the skillet.
The sauce will begin bubbling almost immediately.
Use tongs to turn each piece several times, ensuring every surface becomes coated.
Continue cooking for another 2 to 4 minutes while frequently spooning the sauce over the chicken.
During these final minutes, the honey thickens naturally as moisture evaporates. The glaze transforms into a rich coating that clings to the chicken instead of running off the surface.
Keep the heat at a gentle simmer throughout this stage. Honey contains natural sugars that caramelize quickly and may burn if exposed to excessive heat.
As the sauce thickens, the kitchen fills with the aroma of honey, garlic, mustard, and soy sauce blending together into an irresistible combination.
Checking for Doneness
The safest way to determine when chicken is fully cooked is by checking the internal temperature.
Insert a meat thermometer into the thickest part of the chicken.
The temperature should read 165°F (74°C) before serving.
At this point, the chicken should remain juicy while the glaze appears thick, shiny, and evenly coated over every piece.
If the sauce seems thinner than desired, allow it to simmer for another minute or two before removing the skillet from the heat.
Rest the Chicken Before Serving
Once the chicken reaches an internal temperature of 165°F (74°C), transfer it to a serving plate and let it rest for 3 to 5 minutes. This short resting time allows the juices to redistribute throughout the meat, helping each piece stay moist and tender when sliced.
While the chicken is resting, spoon the remaining glaze from the skillet over the top. The warm sauce adds extra flavor and gives the chicken its signature glossy finish. If desired, garnish with chopped parsley, sliced green onions, or a sprinkle of sesame seeds just before serving.
Serving Suggestions
Honey Glazed Chicken is easy to pair with a variety of side dishes, making it suitable for both casual dinners and special meals. The sweet and savory glaze complements simple sides without overpowering them.
For a classic combination, serve the chicken over steamed white rice, jasmine rice, or brown rice. The rice absorbs the extra glaze, creating a flavorful meal with very little effort.
Mashed potatoes provide a creamy contrast to the sticky sauce, while roasted potatoes add a crisp texture that works equally well with the rich glaze.
Vegetables are another excellent choice. Steamed broccoli, roasted carrots, green beans, asparagus, Brussels sprouts, or mixed vegetables all pair beautifully with the flavors of the chicken.
For a lighter meal, slice the chicken and serve it over a fresh green salad with cucumbers, tomatoes, and your favorite dressing. It can also be served with buttered noodles or simple pasta for a quick family dinner.
Helpful Tips for the Best Results
A few simple techniques can make a noticeable difference in both flavor and texture.
Always pat the chicken dry before seasoning. Removing excess moisture helps create a better sear and allows the chicken to develop a rich golden color.
Cook the chicken over medium heat rather than high heat. This allows the meat to cook evenly while preventing the outside from becoming too dark before the center is fully cooked.
Avoid turning the chicken too often. Leaving it undisturbed during the first few minutes of cooking helps create a flavorful crust.
When adding the glaze, reduce the heat slightly. Honey contains natural sugars that caramelize quickly, so gentle heat helps the sauce thicken without burning.
If the glaze becomes thicker than expected, add a small splash of water and stir until it reaches the desired consistency.
Using a meat thermometer is the most reliable way to ensure perfectly cooked chicken every time.
Easy Ways to Customize the Recipe
This recipe can easily be adapted to suit different tastes while keeping the same cooking method.
For a spicier version, increase the amount of red chili flakes or add a few drops of your favorite hot sauce to the glaze.
Fresh ginger can be added with the garlic for a slightly different flavor profile that pairs well with the honey and soy sauce.
A small drizzle of sesame oil stirred into the glaze just before serving adds a subtle nutty aroma.
For a brighter finish, squeeze a little fresh lemon juice over the chicken before serving.
Chicken thighs can be substituted for chicken breasts if a richer flavor and juicier texture are preferred. The cooking time may vary slightly depending on their size.
Storage Instructions
Allow the chicken to cool completely before storing.
Place leftovers in an airtight container and refrigerate for up to 4 days. Keeping the chicken tightly covered helps maintain its moisture and prevents the glaze from drying out.
For longer storage, transfer the cooled chicken to freezer-safe containers or freezer bags and freeze for up to 3 months. Label the container with the date so it can be used while at its best quality.
Thaw frozen chicken overnight in the refrigerator before reheating.
Reheating Instructions
For the best texture, reheat the chicken in a skillet over medium-low heat with a small splash of water. Stir the glaze occasionally until it becomes smooth and the chicken is heated through.
Individual portions can also be reheated in the microwave using 30-second intervals until warm.
If reheating in the oven, place the chicken in a baking dish, cover it loosely with foil, and warm at 350°F (175°C) for about 10 to 15 minutes.
Avoid overheating, as prolonged cooking may cause the chicken to become dry.
Frequently Asked Questions
Can I use chicken thighs instead of chicken breasts?
Yes. Boneless, skinless chicken thighs work just as well and often produce an even juicier result because of their higher fat content.
Can I prepare the glaze ahead of time?
Yes. The glaze can be mixed up to three days in advance and stored in an airtight container in the refrigerator. Stir it well before using.
Why didn’t my glaze thicken?
The sauce needs a few minutes to simmer after being added to the skillet. As the liquid reduces, the honey naturally thickens into a glossy coating.
Can this recipe be baked instead?
Yes. Bake the seasoned chicken at 400°F (200°C) until nearly cooked through, then coat it with the prepared glaze and continue cooking until the chicken reaches 165°F (74°C).
Is apple cider vinegar necessary?
No. It adds a mild tang that balances the sweetness, but the recipe will still taste delicious without it.
Can I make this recipe gluten-free?
Yes. Replace the regular soy sauce with gluten-free soy sauce or tamari while keeping all the other ingredients the same.
Why did my honey burn?
Honey caramelizes quickly over high heat. Keeping the skillet at a gentle simmer after adding the glaze helps prevent burning while allowing the sauce to thicken properly.
Final Thoughts
Honey Glazed Chicken is proof that simple ingredients can come together to create a meal full of flavor. The combination of tender chicken and a sticky honey glaze made with soy sauce, mustard, garlic, and a touch of vinegar creates a delicious balance of sweet and savory in every bite.
Its short cooking time, familiar ingredients, and versatile serving options make it a dependable recipe for both busy weeknights and relaxed family dinners. Whether paired with rice, potatoes, vegetables, noodles, or a fresh salad, this dish delivers satisfying results without requiring complicated techniques. Once you’ve made it, it’s easy to see why it becomes a recipe worth making again and again.
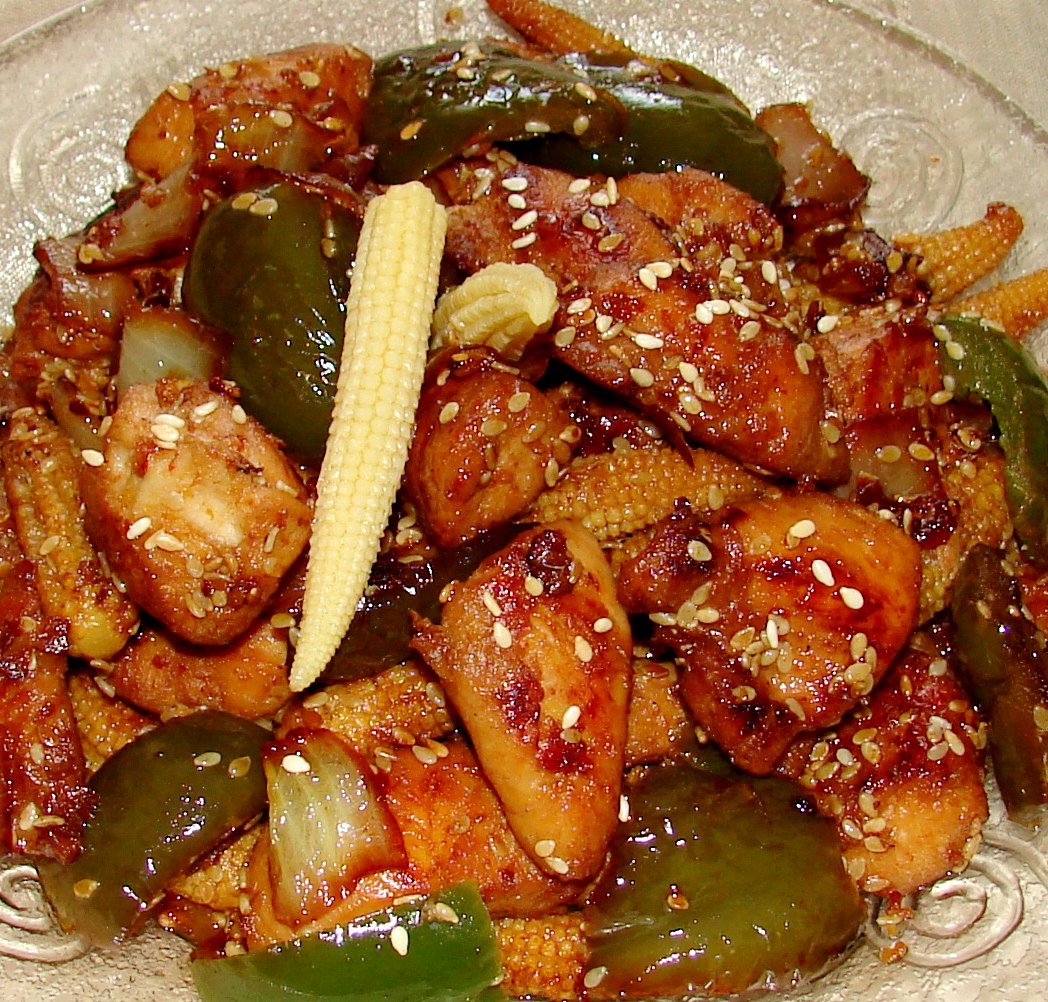
Honey Glazed Chicken
Honey Glazed Chicken is a quick and flavorful main dish made with tender chicken coated in a rich glaze of honey, soy sauce, mustard, garlic, and a touch of apple cider vinegar. The glaze cooks down into a glossy, sticky sauce that perfectly balances sweet, savory, and tangy flavors. Ready in about 30 minutes, this recipe is ideal for weeknight dinners and pairs well with rice, potatoes, vegetables, noodles, or fresh salads.
4
servings10
minutes20
minutes320
kcalIngredients
4 boneless, skinless chicken breasts (or thighs)
Salt, to taste
Black pepper, to taste
1–2 tablespoons olive oil or vegetable oil
1/3 cup honey
2 tablespoons soy sauce
2 tablespoons Dijon mustard or yellow mustard
1–2 cloves garlic, minced
1 teaspoon apple cider vinegar (optional)
1/2 teaspoon black pepper
Pinch of red chili flakes (optional)
Directions
- Remove the chicken from the refrigerator about 10 to 15 minutes before cooking. Pat it dry with paper towels, then season both sides with salt and black pepper.
- In a medium bowl, whisk together the honey, soy sauce, mustard, minced garlic, apple cider vinegar, black pepper, and red chili flakes until smooth.
- Heat the oil in a large skillet over medium heat. Add the chicken in a single layer and cook for 4 to 5 minutes without moving it. Flip and cook for another 4 to 5 minutes, or until the chicken is almost cooked through.
- Reduce the heat slightly and pour the prepared glaze into the skillet. Turn the chicken several times to coat it evenly. Simmer for 2 to 4 minutes, occasionally spooning the glaze over the chicken until it thickens into a glossy coating.
- Use a meat thermometer to check the thickest part of the chicken. The internal temperature should reach 165°F (74°C). If the glaze needs to thicken further, simmer for an additional minute or two.
- Transfer the chicken to a serving plate and let it rest for 3 to 5 minutes. Spoon the remaining glaze over the chicken and garnish with parsley, green onions, or sesame seeds if desired.
Notes
- Patting the chicken dry helps create a better golden crust.
Avoid overcrowding the skillet to ensure even browning.
Keep the heat at a gentle simmer after adding the glaze to prevent the honey from burning.
Chicken thighs can be used instead of chicken breasts and may require slight adjustments to the cooking time.
For a spicier version, increase the red chili flakes or add a few drops of hot sauce.
Leftovers can be refrigerated in an airtight container for up to 4 days or frozen for up to 3 months.
Reheat gently on the stovetop with a splash of water or in the microwave until warmed through.
Nutrition Facts
- Calories: 320kcal
- Fat: 12g
- Saturated Fat: 2g
- Trans Fat: 0g
- Cholesterol: 90mg
- Sodium: 550mg
- Potassium: 450mg
- Carbohydrates: 18g
- Sugar: 14g
- Protein: 32g
- Calcium: 20mg
- Iron: 1mg


Yum