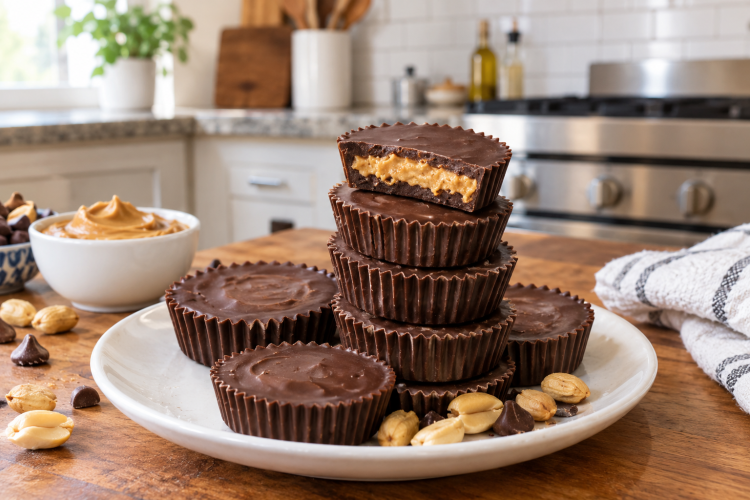
Keto peanut butter cups are a delicious option for anyone who loves the combination of rich chocolate and creamy peanut butter but wants to reduce their sugar and carbohydrate intake. Made with sugar-free chocolate, coconut oil, thick peanut butter, powdered monk fruit sweetener, and peanut flour, these homemade chocolate peanut butter cups deliver a familiar candy-shop flavor without the traditional added sugar. Each cup contains approximately 3.2 grams of net carbs according to the supplied nutrition information, making them a convenient sweet treat for people following a low-carb or ketogenic eating plan.
One of the best things about this keto peanut butter cups recipe is that it uses simple ingredients and requires very little active preparation. Instead of baking a complicated dessert, you create three layers: a chocolate base, a smooth peanut butter center, and a final chocolate topping. Each layer is chilled until firm before the next one is added, giving the finished cups a defined shape and a satisfying texture. Although the freezing time adds to the total preparation period, the actual hands-on work is straightforward enough for beginners.
These sugar-free peanut butter cups are also useful when you want to prepare dessert ahead of time. You can make a batch, store the finished treats in the refrigerator, and enjoy one whenever you want something sweet. They work well as an after-dinner dessert, a small afternoon snack, or a homemade addition to a holiday treat platter. Because the recipe makes 12 servings, it is also suitable for sharing with family and friends who enjoy chocolate and peanut butter combinations.
Why You Will Love This Keto Peanut Butter Cups Recipe
Rich Chocolate and Peanut Butter Flavor
Chocolate and peanut butter complement each other beautifully. The chocolate coating provides a deep cocoa flavor, while the peanut butter center adds a creamy, nutty taste. Using sugar-free dark chocolate helps keep the recipe aligned with a low-carb lifestyle without removing the familiar flavor that makes peanut butter cups so popular. The small amount of vanilla extract, when included, adds another layer of flavor and helps round out the chocolate and peanut butter combination.
A Firm, Creamy Peanut Butter Center
Texture is an important part of a good homemade peanut butter cup. A filling that is too runny may spread into the chocolate coating, while one that is too dry can become crumbly. This recipe uses peanut flour and powdered sweetener to create a thicker center that holds its shape once chilled. Coconut oil also helps the mixture come together. When the layers are given enough time to firm up, each cup has a defined chocolate shell and a peanut butter middle that feels satisfying rather than liquid.
Low-Carb and Sugar-Free Ingredients
Traditional peanut butter cups generally contain added sugar, which can make them difficult to fit into a low-carbohydrate eating plan. This homemade version uses sugar-free chocolate chips and a powdered monk fruit and allulose sweetener blend instead. The supplied nutrition information lists approximately 0.1 grams of sugar and 3.2 grams of net carbohydrates per cup. Actual values may vary depending on the chocolate, peanut butter, sweetener, and serving size you use, so check your product labels if you are tracking carbohydrates carefully.
No Oven Required
Another advantage of this recipe is that you do not need to turn on the oven. The chocolate is melted gently on the stovetop using a double boiler or in the microwave at short intervals. After that, the ingredients are layered in lined muffin cups and chilled in the freezer. This makes the recipe convenient when you want a homemade dessert without baking, mixing a traditional cake batter, or spending a long time in the kitchen.
Ideal for Preparing Ahead
Homemade keto peanut butter cups are easy to prepare in advance because they keep well when stored properly. Once the chocolate has completely hardened, transfer the cups to an airtight container and refrigerate them. You can also freeze them for longer storage. Making a batch ahead of time means you have a portioned dessert ready whenever you need a quick sweet bite, and the individual cups are easy to serve without cutting or plating a larger dessert.
Ingredients for Sugar-Free Keto Peanut Butter Cups
Sugar-Free Chocolate Chips
Sugar-free dark chocolate chips create both the bottom and top layers of the cups. Choose a chocolate product sweetened with a sugar substitute that suits your dietary needs. Since the chocolate makes up most of the outer shell, its flavor has a noticeable effect on the finished dessert. A sweetened sugar-free chocolate is recommended because unsweetened baking chocolate can produce a much more bitter result. Divide the chocolate into two equal portions so you can prepare the base and topping separately.
Coconut Oil
Coconut oil is used in both the chocolate coating and the peanut butter filling. It helps the chocolate melt smoothly and contributes to a firm finish once the cups are chilled. The recipe specifies coconut oil that is solid at room temperature. Dividing it between the layers helps maintain the intended proportions and texture. Melt the oil together with the chocolate rather than adding it after the chocolate has already cooled, so the mixture is easier to stir and distribute evenly in the liners.
Creamy, Thick Peanut Butter
Peanut butter forms the center of these low-carb chocolate cups. Choose a thick, creamy variety without added sugar, and check the nutrition label before purchasing. Some natural peanut butters separate during storage and become quite runny after stirring, so select one that has a consistency suitable for a firm filling. Peanut butter provides the familiar nutty taste that balances the chocolate coating. If your peanut butter is unusually thin, the finished center may not have exactly the same texture as the recipe intends.
Powdered Monk Fruit Allulose Sweetener
The peanut butter filling uses powdered monk fruit allulose blend to add sweetness without relying on conventional powdered sugar. A powdered sweetener is particularly useful because it mixes into the filling more smoothly than many granulated alternatives. The amount can be adjusted to taste within the recipe’s intended ingredient proportions. However, different sweetener blends vary in sweetness and texture, so changing brands may affect the result. Use the specified powdered form rather than a liquid sweetener or a highly concentrated alternative.
Peanut Flour
Peanut flour helps thicken the filling while preserving its peanut flavor. Because it is finely ground, it can blend into the peanut butter mixture without creating the coarse texture that some other low-carb flours may produce. This ingredient is especially useful for creating a center that stays in place between the chocolate layers. Measure it carefully, as the amount contributes to the balance between a creamy filling and a filling firm enough to hold its shape after chilling.
Optional Vanilla Extract and Sea Salt
Vanilla extract is optional, but it can give the chocolate and peanut butter layers a warmer, more rounded flavor. Sea salt is also optional and can be added to the peanut butter filling to balance its sweetness. Since peanut butter and sugar-free chocolate products vary in flavor, taste the filling before assembling the cups if you want to adjust these optional ingredients. Keep the quantities modest so the vanilla and salt complement the main flavors rather than overpowering them.
How to Make Homemade Keto Peanut Butter Cups
Step 1: Prepare the Muffin Pan
Start by lining a muffin pan with parchment paper liners or small candy cups. Make sure the liners sit securely in the pan so they remain upright as you add the melted chocolate. Preparing the pan before melting the chocolate makes the assembly process easier because the chocolate can begin to thicken as it cools. Arrange the liners with enough space to spoon the chocolate into each one neatly and distribute the mixture as evenly as possible.
Step 2: Melt the Chocolate for the Bottom Layer
Divide the chocolate chips and coconut oil into two equal portions. Place half of the chocolate, approximately 5 ounces, in a heatproof bowl with half of the coconut oil, approximately 2½ tablespoons. Set the bowl over a double boiler and warm the mixture gently, stirring frequently until smooth. Alternatively, microwave the ingredients in short intervals of about 20 seconds, stirring between each interval. Avoid overheating the chocolate, and stir in half of the optional vanilla extract if desired.
Step 3: Add the First Chocolate Layer
Spoon approximately 2 teaspoons of the melted chocolate mixture into each prepared liner. Gently distribute the chocolate across the bottom so the base is even. You do not need a thick layer at this stage, but try to cover the bottom of every liner completely. Place the pan in the freezer for around 10 minutes, or until the surface of the chocolate is firm enough to support the peanut butter filling without mixing into it.
Step 4: Prepare the Peanut Butter Filling
While the chocolate bases chill, place the peanut butter and the additional 2 teaspoons of coconut oil in a heatproof bowl. Warm them gently using the double boiler or microwave method described earlier. Stir until the mixture becomes smooth and easy to combine. Add the powdered monk fruit allulose blend and peanut flour, followed by the optional vanilla extract and sea salt. Mix thoroughly until the filling has a consistent texture, with no obvious pockets of dry flour or sweetener.
Step 5: Add the Peanut Butter Center
Spoon approximately 1 teaspoon of the peanut butter mixture into the center of each chilled chocolate base. Keep the filling toward the middle rather than spreading it all the way to the edges. Leaving a narrow border around the filling allows the top chocolate layer to flow down the sides and connect with the bottom layer. Once all the cups are filled, return the pan to the freezer for another 10 minutes, or until the peanut butter layer has become firm on top.
Step 6: Prepare the Chocolate Topping
Melt the remaining 5 ounces of chocolate chips with the remaining 2½ tablespoons of coconut oil. Use the same gentle double-boiler method or microwave the mixture in short intervals, stirring regularly. Once the chocolate is smooth, add the remaining optional vanilla extract if you are using it. Keeping the topping warm enough to pour but not excessively hot makes it easier to cover the filling without disturbing the chilled peanut butter centers.
Step 7: Finish the Peanut Butter Cups
Pour approximately 2 teaspoons of melted chocolate over each peanut butter center. Allow the chocolate to spread over the top and flow into the open space around the filling. The goal is to cover the peanut butter completely and connect the upper chocolate layer with the base, creating a sealed cup. If necessary, gently guide the chocolate toward the edges with the back of a small spoon. Work steadily so the topping remains easy to handle.
Step 8: Freeze Until Firm
Return the muffin pan to the freezer for at least 20 to 30 minutes, or until the chocolate shells have fully set. The cups should feel firm and hold their shape when lifted from the liners. If the centers or tops still feel soft, give them additional chilling time rather than removing them too early. Once set, transfer the homemade keto peanut butter cups to an airtight container and keep them refrigerated until you are ready to serve.
Tips for Making the Best Keto Peanut Butter Cups
Melt Chocolate Slowly
Chocolate can become thick or grainy if it gets too hot, so gentle heating is important. A double boiler gives you good control over the temperature because the chocolate warms gradually above hot water. If you prefer the microwave, heat the chocolate and coconut oil in short intervals and stir thoroughly between each one. Stop heating when only a few small pieces remain, then continue stirring until the mixture becomes completely smooth.
Choose the Right Peanut Butter
The consistency of your peanut butter can make a noticeable difference in the filling. A thick, creamy peanut butter without added sugar is the best choice for this recipe. Very runny peanut butter may create a softer center, while a variety containing added sugar can change the sweetness and nutritional profile. Stir natural peanut butter thoroughly before measuring it, but make sure it remains thick enough to hold its shape once mixed with the other filling ingredients.
Use Powdered Sweetener for a Smooth Filling
Powdered monk fruit allulose blend helps the peanut butter filling develop a smooth consistency. Some alternative sweeteners can leave a grainy texture, particularly after refrigeration, so the type and form of sweetener matter. If you substitute another product, select a powdered variety and remember that sweetness levels differ among brands. Avoid replacing it directly with liquid sweetener or a highly concentrated product, because these alternatives can change the moisture balance and texture of the filling.
Allow Every Layer to Set
The most important step in assembling these homemade sugar-free peanut butter cups is allowing enough chilling time between layers. The bottom chocolate layer should be firm before you add the filling, and the filling should be firm enough to support the topping. If the layers are still soft, they can blend together, making the finished cups less distinct. Follow the recommended chilling intervals and extend them slightly when needed, especially if your freezer is crowded or the ingredients were warm.
Measure the Layers Evenly
Using approximately the same amount of chocolate and peanut butter mixture in each liner helps the finished cups look consistent. A small measuring spoon makes portioning easier and reduces the chance of running out of chocolate before all the cups are covered. The peanut butter filling should sit near the center, leaving room for the topping to seal around it. Even layers also help the cups chill at a similar rate, making them easier to remove from their liners and serve.
Variations and Ingredient Substitutions
Try Different Sugar-Free Chocolate
You can experiment with different varieties of sweetened sugar-free chocolate to change the flavor of the outer shell. Sugar-free dark chocolate creates a deeper cocoa taste, while another sweetened sugar-free chocolate may give the cups a milder flavor. Choose a product that melts smoothly and check its ingredient and nutrition labels. Because chocolate brands differ in sweetness, fat content, and texture, a substitution may slightly change the firmness and flavor of the finished cups.
Consider Alternative Nut or Seed Butters
Almond butter or sunflower seed butter may be used as alternatives to peanut butter, although the texture will not necessarily be identical. Some varieties are thinner than thick peanut butter and may produce a softer filling. If you experiment with a substitute, choose a creamy product with a consistency similar to the original ingredient. Keep in mind that changing the nut or seed butter also changes the flavor and may affect the nutritional information, so recalculate the nutrition if accurate tracking is important.
Adjust the Optional Flavorings
Vanilla extract and sea salt are optional ingredients that allow you to personalize the flavor. Vanilla adds warmth to the chocolate and peanut butter, while a small pinch of sea salt can balance sweetness and emphasize the nutty taste. You can omit either ingredient without changing the basic three-layer method. However, keep the core ingredient quantities consistent if you want to preserve the intended texture and structure of the original recipe.
How to Store Keto Peanut Butter Cups
Refrigerating the Finished Cups
Store the finished keto peanut butter cups in an airtight container in the refrigerator. Chilling helps the coconut oil and chocolate remain firm, which keeps the cups easier to handle and gives them a satisfying bite. Separate layers with parchment paper if you stack the cups to help prevent them from sticking together. The original recipe recommends refrigerated storage for several weeks, although the exact quality and storage life depend on the freshness of the ingredients, handling, and refrigerator temperature.
Freezing for Longer Storage
These low-carb peanut butter cups can also be frozen for up to six months according to the supplied recipe information. Place the fully set cups in a freezer-safe airtight container, separating layers with parchment paper to protect their shape. When you want to enjoy one, let it soften in the refrigerator or briefly at room temperature. You can also eat the cups straight from the freezer if you prefer a firmer texture, allowing each bite to soften gradually as you eat.
Keeping the Chocolate Shell Intact
To maintain the best texture, avoid leaving the cups in a warm environment for extended periods. Coconut oil helps the chocolate mixture set, but it can soften when exposed to heat. If you are serving these treats at a gathering, keep them refrigerated until close to serving time. Return leftovers to the refrigerator promptly, and use a clean, dry utensil when handling them to help maintain their quality.
Frequently Asked Questions About Keto Peanut Butter Cups
Are Keto Peanut Butter Cups Suitable for a Keto Diet?
These peanut butter cups are designed for a ketogenic or low-carbohydrate eating plan because they use sugar-free chocolate and a powdered low-carb sweetener instead of conventional sugar. The supplied nutritional information lists approximately 3.2 grams of net carbs per cup. Individual dietary needs and daily carbohydrate limits vary, so consider the serving size and check the labels of the ingredients you purchase before including them in your meal plan.
How Many Net Carbs Are in One Peanut Butter Cup?
According to the supplied nutrition figures, each serving contains 8.1 grams of total carbohydrates and 4.9 grams of fiber, resulting in approximately 3.2 grams of net carbohydrates. Net carbohydrates are calculated here by subtracting fiber from total carbohydrates. These figures are estimates rather than universal values. Different chocolate brands, peanut butters, and sweetener blends can change the final nutritional breakdown, so your own batch may have slightly different values.
Can I Make These Peanut Butter Cups Without a Double Boiler?
Yes. A microwave is an alternative for melting the chocolate and coconut oil. Heat the mixture in short intervals of approximately 20 seconds, stirring well between each interval until it becomes smooth. Avoid heating it continuously for too long, as chocolate can scorch or become difficult to work with. You can also gently warm the peanut butter and coconut oil in the microwave before stirring in the powdered sweetener and peanut flour.
Why Is My Peanut Butter Filling Too Runny?
A runny filling is often caused by peanut butter that is too thin or by adding ingredients that alter the intended balance. Natural peanut butter can vary significantly in consistency, especially when its oil has separated. For the best results, choose a thick and creamy variety without added sugar, measure the ingredients carefully, and allow the filling to chill before adding the final chocolate layer. The peanut flour is included specifically to help thicken the center.
Can I Make These Peanut Butter Cups Ahead of Time?
Yes. These treats are well suited to preparing ahead because they need time to chill between layers and can be stored once fully set. Make the complete batch, transfer the cups to an airtight container, and refrigerate them until needed. For longer storage, freeze them in a suitable container. This makes them convenient for holiday gatherings, parties, packed desserts, or keeping a small portion-controlled treat ready at home.
Are These Peanut Butter Cups Gluten-Free and Dairy-Free?
The recipe is presented as gluten-free and dairy-free, but the finished result depends on the exact products used. Check the sugar-free chocolate chips, peanut butter, sweetener, and other packaged ingredients for relevant allergen statements and cross-contact warnings. If you have celiac disease, a milk allergy, or another food-related medical concern, choose products that meet your requirements rather than relying solely on a general recipe description.
Serving Ideas for Sugar-Free Peanut Butter Cups
Keto peanut butter cups are delicious on their own, but they can also be served alongside other low-carb desserts. Add one to a dessert plate with a few fresh berries, serve it with unsweetened coffee, or enjoy it after a meal when you want a small chocolate treat. Their individual portions make serving simple, and the layered appearance gives them a homemade candy-shop look without requiring complicated decorating techniques or special confectionery equipment.
For celebrations, you can arrange the cups in small paper liners on a dessert tray. They are suitable for occasions such as Halloween, Easter, family gatherings, and holiday parties, provided the ingredients meet the needs of your guests. Keep the cups chilled until serving so the chocolate shells remain firm. If you are preparing desserts for a group, clearly label the peanut butter ingredient because peanuts are a common food allergen and may be unsuitable for some guests.
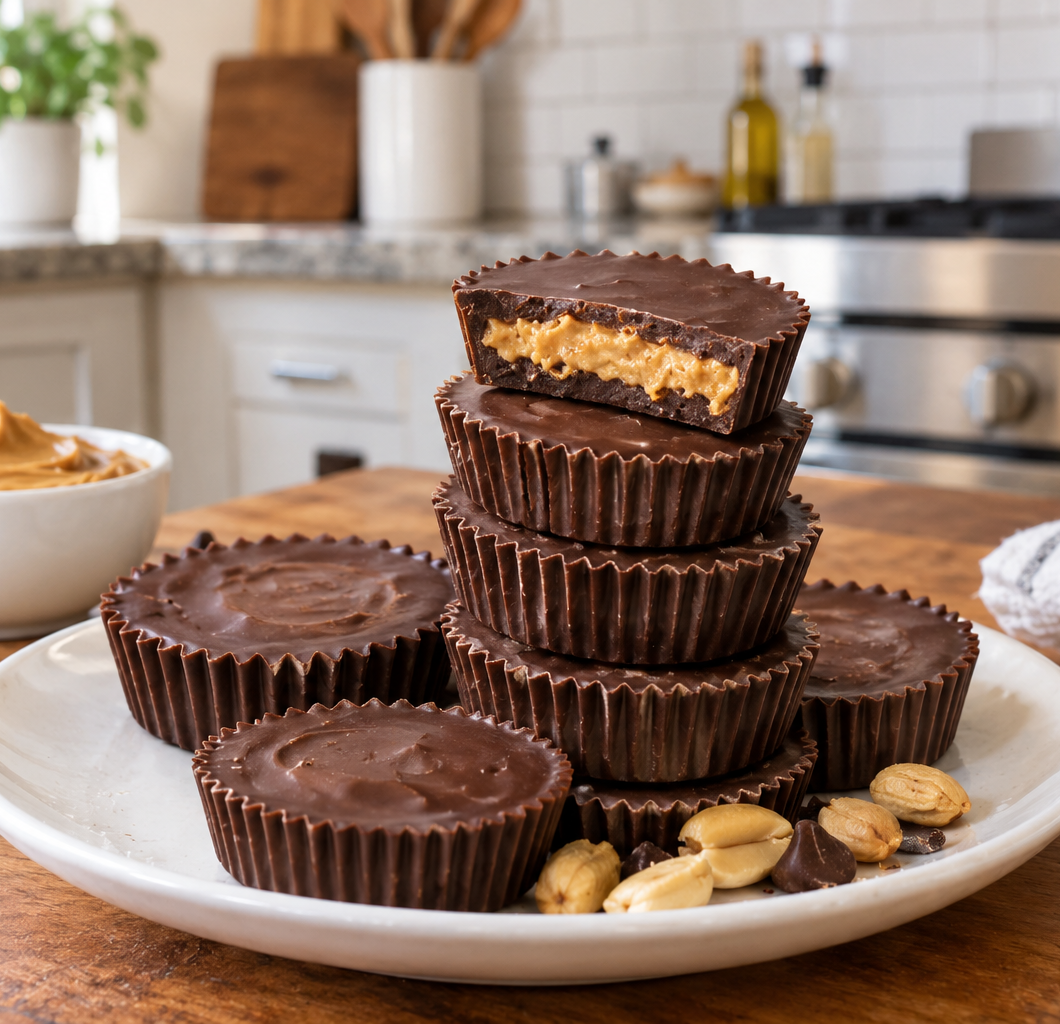
KETO PEANUT BUTTER CUPS
 Recipe by admin
Rich, sugar-free chocolate peanut butter cups with a creamy, firm center. This easy no-bake keto dessert uses five main ingredients, plus optional vanilla extract and sea salt.
4
servings10
minutes5
minutes145
kcal40
minutes55
minutesIngredients
- Chocolate Layers
10 oz sugar-free dark chocolate chips, or another sweetened sugar-free chocolate, divided
5 tbsp coconut oil, divided
1/2 tsp vanilla extract, optional and divided
- Peanut Butter Layer
3 1/2 tbsp creamy, thick peanut butter, not runny
2 tsp coconut oil, solid at room temperature
2 tbsp Besti Powdered Monk Fruit Allulose Blend, or to taste
1/2 tbsp peanut flour
1/8 tsp vanilla extract, optional
1 pinch sea salt, optional and to taste
Directions
- Prepare the pan. Line a muffin pan with parchment paper liners or candy cups.
- Melt the bottom chocolate layer. Melt half of the chocolate chips (5 oz) with half of the coconut oil (2 1/2 tbsp) in a double boiler over low heat, stirring frequently. Alternatively, microwave in 20-second intervals, stirring between each interval. Stir in half of the vanilla extract (1/4 tsp), if using.
- Fill the liners. Spoon approximately 2 teaspoons of melted chocolate into each liner, covering the bottom evenly. Freeze for about 10 minutes, until the chocolate surface is firm.
- Make the peanut butter filling. Warm the peanut butter with the additional 2 teaspoons of coconut oil. Stir in the powdered sweetener, peanut flour, optional vanilla extract, and optional sea salt until smooth. Adjust sweetness or salt to taste.
- Add the filling. Place approximately 1 teaspoon of the peanut butter mixture in the center of each chocolate base. Leave a small border around the filling so the top chocolate can seal around it. Freeze for another 10 minutes, until the surface is firm.
- Melt the remaining chocolate. Melt the remaining 5 oz of chocolate chips with the remaining 2 1/2 tablespoons of coconut oil. Stir until smooth and add the remaining 1/4 teaspoon of vanilla extract, if using.
- Cover the filling. Spoon approximately 2 teaspoons of melted chocolate over each peanut butter center. Allow the chocolate to spread around the filling and cover the top completely.
- Chill until set. Freeze for another 20–30 minutes, or until the cups are completely firm. Transfer to an airtight container and store in the refrigerator.
Notes
- Use thick, creamy peanut butter without added sugar for the best filling consistency.
- Melt chocolate slowly to prevent scorching or a grainy texture.
- Allow each layer to firm up before adding the next one.
- Powdered sweetener is recommended for a smoother filling; substitutions may affect texture.
- Store in an airtight container in the refrigerator. The supplied recipe indicates that the cups can be frozen for up to six months.
- Check packaged ingredients for gluten, dairy, and allergen information if dietary restrictions apply.
Nutrition Facts
4 servings per container
- Amount Per ServingCalories145
- % Daily Value *
- Total Fat
14.4g
18%
- Total Carbohydrate
8.1g
3%
- Protein 3.8g 6%
* The % Daily Value tells you how much a nutrient in a serving of food contributes to a daily diet. 2,000 calories a day is used for general nutrition advice.


