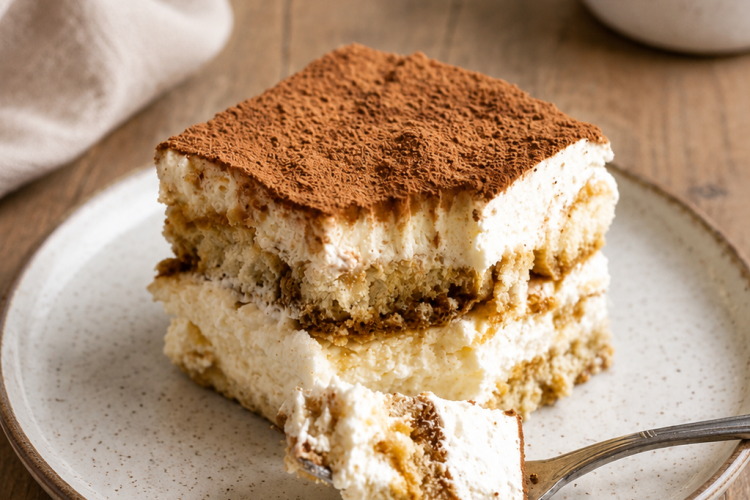
Tiramisu is one of those desserts that feels elegant enough for celebrations but is surprisingly simple to prepare at home. Whenever I want to make something that looks impressive without spending hours in the kitchen, this recipe is always at the top of my list. It combines soft coffee-soaked ladyfingers with a rich mascarpone filling and a light dusting of cocoa powder, creating layers of flavor that are creamy, delicate, and perfectly balanced.
One of the things I appreciate most about this recipe is that it doesn’t require baking. Once the layers are assembled, the refrigerator does most of the work. As the dessert chills, the ladyfingers soften, the mascarpone filling becomes beautifully set, and all of the flavors blend together into a smooth and satisfying dessert.
This version keeps the preparation simple by using freshly whipped cream instead of raw eggs. The result is a filling that is light, creamy, and easy to prepare while still delivering the classic flavor that makes tiramisu such a popular dessert. Every bite offers the perfect combination of espresso, mascarpone, cocoa, and soft ladyfingers.
Whether I’m preparing dessert for a family dinner, a holiday table, or simply making something special for the weekend, this homemade tiramisu never disappoints. It’s one of those recipes that tastes even better after a few hours in the refrigerator, making it an excellent choice when I want to prepare dessert ahead of time.
Why every one like this Recipe
There are countless tiramisu recipes available, but I always return to this one because it focuses on simple preparation without sacrificing flavor or texture.
Instead of making a custard with eggs, the filling comes together by whipping mascarpone cheese with heavy cream, sugar, and vanilla. This creates a smooth mixture that spreads easily between the layers while remaining light and fluffy after chilling.
The espresso gives the dessert its signature coffee flavor without becoming overpowering, while the cocoa powder adds just enough richness to finish every slice. If I want to enhance the coffee flavor even more, I simply add a small amount of coffee-flavored liqueur to the espresso before dipping the ladyfingers.
Another reason this recipe works so well is that it can be prepared well before serving. In fact, I often make it the night before because the texture becomes even better after resting in the refrigerator overnight.
What Makes This Tiramisu Special?
Although tiramisu has been enjoyed for many years, every home cook eventually develops a version that becomes a favorite. What makes this recipe stand out is its balance of simplicity and flavor.
The mascarpone filling is rich without feeling heavy. Since it uses whipped cream instead of whipped egg whites, the texture is incredibly smooth and stable. This also makes the preparation much more approachable for anyone who prefers not to use raw eggs.
The coffee layer is another important feature. Ladyfingers are only dipped briefly into the espresso so they remain structured during assembly. As the dessert chills, they absorb just enough moisture to become soft without turning mushy.
Finally, the cocoa powder ties everything together. A generous dusting over the finished dessert adds a slight bitterness that balances the sweetness of the filling and complements the coffee beautifully.
Ingredients
One of the best things about tiramisu is that it relies on only a handful of ingredients, yet each one contributes something important to the finished dessert.
Savoiardi Ladyfingers
Ladyfingers create the structure of the dessert. Their light, crisp texture allows them to absorb the espresso while still holding their shape. After chilling, they become wonderfully soft and cake-like, creating distinct layers throughout the tiramisu.
Mascarpone Cheese
Mascarpone is the heart of the filling. Its creamy texture and mild flavor create the rich layers that make tiramisu so recognizable. Because it blends smoothly with whipped cream, it produces a filling that is silky without being overly dense.
Espresso
Freshly brewed espresso provides the deep coffee flavor that defines traditional tiramisu. Allowing it to cool before dipping the ladyfingers helps prevent them from becoming too soft during assembly.
Heavy Whipping Cream
Heavy whipping cream gives the filling its light, airy texture. Once whipped together with the mascarpone, it creates a stable mixture that spreads easily and sets beautifully after chilling.
Granulated Sugar
Sugar sweetens the filling just enough to balance the slight bitterness of the espresso and cocoa powder while allowing the mascarpone flavor to remain the star of the dessert.
Vanilla Extract
A small amount of vanilla adds warmth and rounds out the flavors of the filling. Either pure vanilla extract or imitation vanilla works well in this recipe.
Cocoa Powder
The final dusting of cocoa powder is more than just decoration. It adds a rich chocolate flavor and creates the classic finish that every homemade tiramisu should have.
Coffee-Flavored Liqueur (Optional)
If serving adults, coffee-flavored liqueur can be mixed into the espresso for additional depth of flavor. It blends naturally with the coffee without overpowering the dessert and can easily be omitted for an alcohol-free version.
Preparing the Creamy Filling
The filling is the part that brings everything together, so I always take a little extra care when making it. In a large mixing bowl, I combine the mascarpone cheese, heavy whipping cream, granulated sugar, and vanilla extract. I prefer to start mixing on a lower speed and gradually increase it so everything blends smoothly without splashing.
As the mixture thickens, it transforms into a light and airy cream. I continue whipping until it reaches stiff peaks, which means the mixture holds its shape when the whisk is lifted. This texture is important because it helps the filling stay stable once layered inside the dessert.
One thing I always keep in mind is not to overmix. If the cream is whipped too far, it can become grainy or lose its smooth consistency. The goal is a thick, spreadable cream that still feels soft and silky.
Once the filling is ready, I set it aside while I prepare the espresso and ladyfingers.
Preparing the Coffee Layer
The espresso needs to be completely cooled before I begin dipping the ladyfingers. Warm coffee can make them fall apart too quickly, so I always make sure it has reached room temperature.
I pour the espresso into a shallow dish, which makes dipping easier and more controlled. If I’m using coffee-flavored liqueur, I mix it into the espresso at this stage so the flavor is evenly distributed.
The key here is balance. The coffee should be strong enough to flavor the dessert but not so overpowering that it overwhelms the mascarpone filling. Once everything is ready, I move quickly to the layering process so the ladyfingers don’t sit too long in the liquid.
Dipping the Ladyfingers Properly
This step can make or break the texture of tiramisu. I take each ladyfinger and dip it quickly into the espresso mixture, making sure both sides are coated.
The important part is speed. A brief dip is all that’s needed. If the ladyfingers soak for too long, they become overly soft and collapse during layering. A quick dip allows them to absorb just enough coffee to soften during chilling while still holding their structure.
As I dip them, I arrange them immediately in the dish to avoid any delay. The goal is to work efficiently so the first layer remains even and stable.
Building the First Layer
Once the bottom of the dish is covered with coffee-dipped ladyfingers, I spread a generous layer of the mascarpone mixture on top. I like to use a spatula to smooth it evenly from edge to edge, making sure there are no gaps.
This first layer sets the foundation for the entire dessert. It should be thick enough to balance the coffee-soaked biscuits underneath while still spreading smoothly across the surface.
After smoothing the cream, I take a moment to check the edges and corners so everything looks even before moving on to the next layer.
Adding the Second Layer
The second layer follows the same process. I dip another batch of ladyfingers quickly in the espresso mixture and arrange them over the mascarpone layer.
Once the second layer is complete, I spread the remaining mascarpone cream over the top. This final layer should be smooth and even, creating a soft surface that will hold the cocoa powder later.
At this stage, the dessert already looks complete, but the final steps of chilling and dusting are what bring everything together.
Finishing with Cocoa Powder
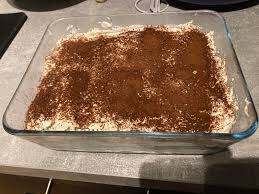
Before placing the tiramisu in the refrigerator, I lightly dust the top with cocoa powder. I usually use a fine sieve to distribute it evenly so it creates a soft, uniform layer.
This step adds a slightly bitter contrast to the sweet, creamy filling underneath. It also gives the dessert its classic appearance, making it instantly recognizable.
Some people prefer to dust the cocoa powder just before serving, but I find that doing it early still works well as long as it is kept covered during chilling.
Chilling the Tiramisu
Once assembled, the tiramisu needs time in the refrigerator to set properly. I always cover the dish tightly and let it chill for at least six hours, although overnight is ideal.
During this time, the ladyfingers absorb moisture from the cream and coffee, softening into a cake-like texture. The mascarpone layer firms up slightly, and all the flavors blend together into a smooth, unified dessert.
I never rush this step because the chilling process is what transforms the individual ingredients into a cohesive tiramisu.
Tips for Best Results
Over time, I’ve learned a few small details that make a noticeable difference:
- Always use cold mascarpone so it holds its texture when whipped.
- Don’t oversoak the ladyfingers—quick dipping is enough.
- Chill the dessert overnight whenever possible for the best flavor.
- Use strong espresso for a more authentic taste.
- Smooth each layer carefully for clean slices when serving.
Serving Suggestions
When it’s time to serve, I remove the tiramisu from the refrigerator and slice it using a sharp knife. Clean cuts work best when the dessert is fully chilled.
I like serving it as it is, but sometimes I pair it with a small cup of espresso or coffee to enhance the flavor even more. It also works beautifully as a make-ahead dessert for gatherings since it holds its shape well once set.
Each slice reveals distinct layers of coffee-soaked ladyfingers and creamy mascarpone filling, making it as visually appealing as it is delicious.
Variations & Storage
Alcohol Options and Flavor Variations
One of the things I like about tiramisu is how flexible it can be while still keeping its identity. The coffee base leaves room for small adjustments depending on preference.
In this recipe, coffee-flavored liqueur is optional, but when I do use it, it blends smoothly into the espresso and deepens the overall flavor. It doesn’t overpower the dessert; instead, it enhances the coffee notes already present in the ladyfingers and filling.
If coffee liqueur isn’t available, there are other options that work well. A small amount of dark rum can add warmth and depth, while brandy gives a slightly richer, more aromatic profile. Marsala wine is another traditional choice that brings a mild sweetness and complexity.
At the same time, this dessert works perfectly without any alcohol at all. The espresso alone provides enough flavor, and the mascarpone filling keeps everything balanced and satisfying.
Make-Ahead Convenience
One of the biggest advantages of this tiramisu is how well it fits into a make-ahead schedule. In fact, I almost never serve it the same day I prepare it.
After assembling the dessert, I always let it rest in the refrigerator for several hours. Overnight chilling is even better because it gives the layers time to fully absorb the coffee and settle into a firm, sliceable texture.
This resting time also improves the flavor. The sweetness of the cream, the bitterness of the cocoa, and the richness of the mascarpone gradually come together, creating a more cohesive dessert than when it’s freshly assembled.
Because of this, tiramisu is one of my go-to desserts when planning ahead for guests or gatherings.
Storing Leftovers
If there are any leftovers, I keep them covered tightly in the refrigerator. The dessert holds up well for about two to three days.
During storage, the texture continues to soften slightly, but it still maintains its structure and flavor. I always make sure it stays covered so it doesn’t absorb other odors from the fridge.
When serving leftovers, I prefer to take them out just a few minutes before slicing so the layers are easier to cut cleanly.
Freezing Instructions
Tiramisu also freezes surprisingly well, which makes it a great dessert to prepare in advance for special occasions.
If I plan to freeze it, I assemble the entire dessert as usual but skip the final dusting of cocoa powder. This helps preserve the appearance and prevents the topping from becoming damp during freezing.
Once assembled, I wrap the dish tightly with plastic wrap and then cover it again with foil to protect it from freezer burn. It can be stored in the freezer for up to three months.
When I’m ready to serve it, I transfer it to the refrigerator and let it thaw overnight. Before serving, I dust the top with cocoa powder so it looks fresh and finished.
Common Mistakes to Avoid
Over time, I’ve noticed a few mistakes that can affect the final result, especially for beginners.
One of the most common issues is over-soaking the ladyfingers. Even a few extra seconds in the espresso can make them too soft, leading to a soggy texture instead of defined layers.
Another issue is overwhipping the mascarpone and cream mixture. While it’s important to reach stiff peaks, going too far can cause the mixture to separate or become grainy.
Using warm espresso is another mistake to avoid. It should always be cooled before dipping, otherwise the ladyfingers break down too quickly.
Finally, rushing the chilling process can affect the texture. Tiramisu really benefits from time in the refrigerator, and cutting it too early often results in loose, unstable layers.
Serving This Tiramisu
When serving, I like to present tiramisu chilled and freshly sliced. A sharp knife helps create clean layers, and wiping the blade between cuts keeps the presentation neat.
It pairs beautifully with a cup of coffee or espresso, especially when served after dinner. The contrast between the cold, creamy dessert and warm coffee makes it even more enjoyable.
For special occasions, I sometimes dust a little extra cocoa powder right before serving to refresh the top layer and enhance its appearance.
This tiramisu is one of those desserts that feels both simple and special at the same time. It doesn’t rely on complicated techniques or hard-to-find ingredients, yet the result is always impressive.
The combination of coffee-soaked ladyfingers and smooth mascarpone cream creates a dessert that is rich, light, and perfectly balanced. Because it’s made without raw eggs, it also feels more approachable while still staying true to the essence of classic tiramisu.
Over time, this has become one of those recipes I return to again and again, especially when I need something that can be prepared ahead and served without stress. Each time I make it, the layers set beautifully, the flavors deepen, and the final result always feels worth the wait.
Easy Tiramisu
A rich and creamy no-bake Italian dessert made with layers of coffee-dipped ladyfingers and a smooth mascarpone cream filling. Finished with a dusting of cocoa powder, this tiramisu is light, indulgent, and best when chilled overnight so the flavors fully develop. No raw eggs are used in this version, making it simple and approachable while still tasting traditional.
9
servings10
minutes10
minutes297
kcalIngredients
- For the Cream Layer:
Heavy Whipping Cream: 360 mL (approx. 357 g)
Mascarpone Cheese (softened at room temperature): 225 g
Granulated Sugar: 67 g
Pure Vanilla Extract: 5 mL (approx. 4 g)
- For the Espresso Soak & Structure:
Prepared Cold Espresso: 360 mL (approx. 355 g)
Coffee Liqueur: 45 mL (approx. 45 g)
Italian Ladyfingers (Savoiardi crisp biscuits): 1 package
- For the Finishing Touch
Unsweetened Cocoa Powder: As needed for dusting the top surface
Directions
- In a large bowl, combine mascarpone cheese, heavy whipping cream, granulated sugar, and vanilla extract. Beat until thick and fluffy with stiff peaks, being careful not to overmix.
- Pour cooled espresso into a shallow dish. If using, mix in coffee-flavored liqueur.
- Quickly dip each ladyfinger into the espresso mixture on both sides. Do not soak.
- Arrange dipped ladyfingers in a single layer in a dish. Spread half of the mascarpone cream evenly over the top.
- Add another layer of dipped ladyfingers, followed by the remaining mascarpone cream. Smooth the top.
- Dust the top generously with cocoa powder.
- Cover and refrigerate for at least 6 hours, preferably overnight, before serving.
Notes
- Do not oversoak ladyfingers or they will become too soft.
- Chilling overnight gives the best texture and flavor.
- Coffee liqueur is optional and can be replaced or omitted.
- Use strong espresso for best coffee flavor.
- For clean slices, ensure tiramisu is fully chilled before cutting.
Nutrition Facts
- Serving Size: 1 g
- Total number of serves: 9
- Calories: 297kcal
- Fat: 18g
- Saturated Fat: 11g
- Polyunsaturated Fat: 1g
- Monounsaturated Fat: 2g
- Cholesterol: 88mg
- Sodium: 77mg
- Potassium: 124mg
- Carbohydrates: 26g
- Fiber: 1g
- Sugar: 11g
- Protein: 15g
- Vitamin A: 618mcg
- Calcium: 90mg
- Iron: -2mg


