There is something incredibly satisfying about perfectly cooked pork belly. The contrast between ultra-crispy crackling, buttery rendered fat, and juicy, flavorful meat creates a dish that is loved in cuisines all over the world. Traditionally, achieving this perfect texture required hours of roasting in an oven, careful monitoring, and sometimes multiple cooking stages. Fortunately, modern air fryers have changed the game completely. With the right preparation and technique, you can achieve restaurant-quality pork belly at home with less time, less mess, and consistently impressive results.
Air fryer pork belly has become increasingly popular because it combines convenience with outstanding texture. The circulating hot air rapidly removes moisture from the skin while slowly rendering the fat underneath. This creates the ideal environment for developing blistered, crunchy crackling while keeping the meat beneath juicy and tender. Whether you are preparing a special weekend dinner, entertaining guests, or simply craving an indulgent meal, this recipe delivers exceptional results every time.
The secret to outstanding air fryer pork belly is understanding that the process begins long before the pork enters the air fryer. Proper drying, scoring, seasoning, and cooking temperatures all work together to create that signature crispy skin and succulent meat. While the recipe itself is relatively simple, attention to detail makes a tremendous difference in the final result.
Why You Will Love This Recipe
This air fryer pork belly recipe offers everything pork lovers are looking for in a single dish. The skin becomes deeply golden and crackly, producing an audible crunch with every bite. The fat layer slowly renders during cooking, transforming from firm and chewy into soft, rich, melt-in-your-mouth goodness. Meanwhile, the meat remains juicy, flavorful, and perfectly seasoned.
Some of the biggest benefits of this recipe include:
- Incredibly crispy crackling
- Tender, juicy meat
- Faster than traditional oven roasting
- Less cleanup than deep frying
- Minimal ingredients required
- Beginner-friendly cooking method
- Perfect for family meals or entertaining
- Excellent leftovers
- Versatile seasoning options
- Restaurant-quality results at home
Ingredients
Main Ingredients
- 500 g to 1 kg pork belly (skin-on, boneless)
- 1 to 1½ teaspoons salt for the meat
- 1 teaspoon salt for the skin
- 1 teaspoon black pepper
- 1 teaspoon garlic powder
- 1 teaspoon onion powder
Optional Flavor Enhancers
- 1 teaspoon smoked paprika
- 1 teaspoon Chinese five-spice powder
- 1 tablespoon soy sauce
- 1 teaspoon white vinegar or apple cider vinegar
- 1 teaspoon baking powder
Equipment Needed
- Air fryer
- Sharp knife
- Paper towels
- Cutting board
- Tongs
- Small bowl
- Aluminum foil (optional)
- Meat thermometer (recommended)
Understanding Pork Belly
Before beginning the cooking process, it helps to understand what makes pork belly unique. Pork belly consists of three distinct layers: the skin, the fat, and the meat. Each layer responds differently to heat and requires careful handling to achieve the best texture.
The skin must lose moisture in order to become crispy. The fat must slowly render to become soft and silky. The meat must cook gently enough to remain juicy while absorbing the seasonings. When all three layers are cooked properly, every bite contains a perfect balance of crunch, richness, and tenderness.
Step 1: Drying the Pork Belly
The first and arguably most important step is drying the pork belly thoroughly. Remove the pork belly from its packaging and place it on a cutting board. Using several paper towels, pat every surface completely dry.
Many home cooks underestimate how important this step is. Moisture trapped on the skin creates steam during cooking, which prevents proper crackling from forming. Even the most expensive air fryer cannot produce crispy skin if the pork belly remains wet.
Take your time and continue blotting until the skin feels completely dry to the touch. The drier the surface, the crispier the final crackling will be.
Step 2: Scoring the Skin
Using a sharp knife, carefully score the skin in parallel lines. Each cut should be approximately 2–3 mm deep and spaced about 1 cm apart.
Avoid cutting deeply into the meat. The goal is to slice through the skin and slightly into the fat layer beneath.
Scoring serves several important purposes:
- Allows fat to render more efficiently
- Creates additional crispy surface area
- Helps moisture escape
- Improves presentation
- Promotes even cooking
When done correctly, the scored sections puff and blister beautifully during cooking.
Step 3: Seasoning the Meat
Turn the pork belly over so the meat side faces upward.
Combine:
- Salt
- Black pepper
- Garlic powder
- Onion powder
Add optional seasonings if desired.
Massage the seasoning mixture thoroughly into the meat. Be sure to season the sides as well.
If using soy sauce, lightly brush it onto the meat portion only.
Avoid placing strong spices directly on the skin because they may burn during the high-temperature crisping stage.
The meat should be evenly coated and fragrant before moving to the next step.
Step 4: Preparing the Skin
Now focus entirely on the skin.
Rub a small amount of vinegar over the scored surface.
Next, sprinkle salt evenly across the skin.
If using baking powder, apply a very light dusting.
This combination works remarkably well because:
Vinegar helps break down proteins and encourages blistering.
Salt pulls moisture from the skin.
Baking powder increases alkalinity, helping the skin brown and crisp more effectively.
The skin should now appear dry, lightly salted, and evenly coated.
Step 5: Overnight Drying (Highly Recommended)
For the best crackling possible, place the pork belly uncovered in the refrigerator.
Allow it to dry for at least 4 hours, though overnight is ideal.
Many professional chefs consider overnight drying one of the biggest secrets to perfect crackling.
During this time:
- Moisture evaporates
- The skin tightens
- Surface proteins dry
- Crisping potential dramatically increases
If you are short on time, allow the pork belly to sit uncovered at room temperature for 30–60 minutes instead.
Step 6: Preheating the Air Fryer
Preheat the air fryer to 180°C (356°F) for approximately 5 minutes.
Preheating ensures consistent cooking from the moment the pork belly enters the basket.
It also helps begin the rendering process immediately.
Step 7: First Cooking Stage – Rendering the Fat
Place the pork belly skin-side up in the air fryer basket.
Cook at 180°C (356°F) for 30–40 minutes.
This stage is extremely important because it slowly melts the fat layer while cooking the meat gently.
During this period:
- Fat begins rendering
- Meat cooks evenly
- Skin dries further
- Internal juices remain trapped
Halfway through cooking, carefully inspect the pork belly.
If excessive rendered fat accumulates, drain it carefully.
Do not flip the pork belly at any point.
Keeping the skin facing upward throughout the process is essential for proper crackling.
Step 8: Second Cooking Stage – Creating the Crackling
After the initial cooking stage is complete, increase the air fryer temperature to 200–205°C (392–401°F).
Continue cooking for 10–20 minutes.
This is where the transformation occurs.
As the intense heat hits the dried skin, it begins to blister, puff, and crisp.
You may hear crackling sounds as moisture escapes and the skin hardens.
Watch carefully during this stage because pork belly can go from perfectly crisp to burnt relatively quickly.
Signs of perfect crackling include:
- Deep golden color
- Blistered surface
- Audible crunch
- Dry, crisp texture
If certain sections are not crisp enough, continue cooking in 2-minute intervals until satisfied.
Step 9: Resting the Pork Belly
Remove the pork belly from the air fryer and place it on a cutting board.
Allow it to rest for 10–15 minutes.
Resting is a critical step that should never be skipped.
During this period:
- Juices redistribute
- Meat relaxes
- Skin firms further
- Slicing becomes easier
Cutting immediately after cooking often causes valuable juices to escape.
Step 10: Slicing and Serving
Using a sharp knife, slice along the scored lines.
Apply firm pressure when cutting through the crackling.
A properly cooked pork belly should produce a satisfying crunch as the knife passes through the skin.
Each slice should reveal:
- Crispy crackling
- Soft rendered fat
- Juicy seasoned meat
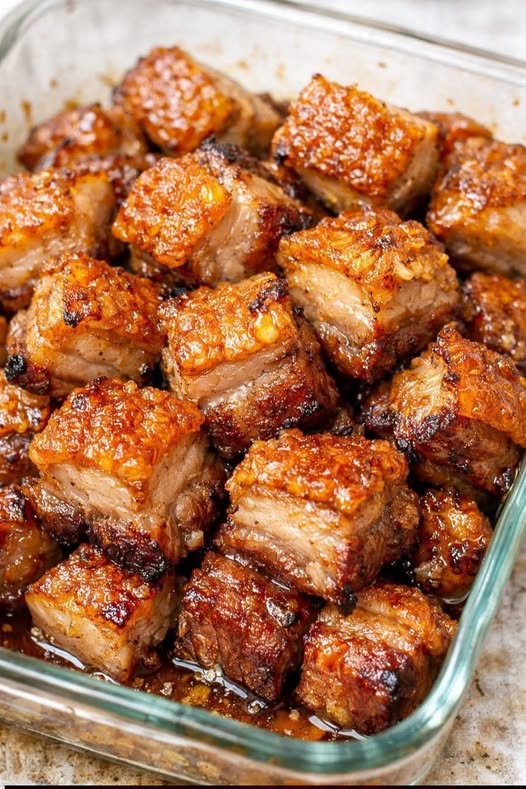
The combination of textures is what makes pork belly such an unforgettable dish.
Flavor Variations
Asian-Inspired Pork Belly
Add soy sauce, five-spice powder, garlic, and ginger to the meat.
Serve with rice, chili oil, and stir-fried vegetables.
Smoky BBQ Pork Belly
Use smoked paprika, garlic powder, and black pepper.
Serve with coleslaw and roasted potatoes.
Spicy Pork Belly
Add cayenne pepper, chili powder, and red pepper flakes.
Pair with cooling yogurt sauce.
Garlic Herb Pork Belly
Season with rosemary, thyme, garlic, and black pepper.
Serve alongside roasted vegetables.
Nutritional Information
Approximate values per serving (based on 6 servings)
| Nutrient | Amount |
|---|---|
| Calories | 520 kcal |
| Protein | 23 g |
| Fat | 45 g |
| Saturated Fat | 16 g |
| Carbohydrates | 2 g |
| Fiber | 0 g |
| Sugar | 0 g |
| Sodium | 650 mg |
| Cholesterol | 85 mg |
Values may vary depending on the size and fat content of the pork belly used.
Storage Instructions
Allow pork belly to cool completely before storing.
Place in an airtight container and refrigerate for up to 3 days.
For longer storage, freeze for up to 2 months.
Reheating Instructions
To restore crispiness:
Air fry at 180°C (356°F) for 5–8 minutes.
Avoid microwaving whenever possible because it softens the crackling.
Frequently Asked Questions
1. Can I cook pork belly without scoring the skin?
Yes, but scoring significantly improves crispiness and allows fat to render more effectively. The final texture will generally be better when the skin is scored.
2. Is baking powder necessary?
No. The recipe works perfectly without it. However, a light dusting can noticeably improve crackling texture and color.
3. Why isn’t my skin crispy?
The most common reasons are excess moisture, insufficient drying time, overcrowding, or not using a high enough temperature during the final crisping stage.
4. Can I use frozen pork belly?
It is best to thaw pork belly completely before cooking. Thawing ensures even cooking and allows seasonings to penetrate properly.
5. Do I need to boil pork belly before air frying?
No. The air fryer’s two-stage cooking process eliminates the need for boiling while still producing tender meat and crispy skin.
6. How do I know when pork belly is done?
The meat should be fully cooked, the fat should be rendered, and the skin should be crispy. An internal temperature of at least 63°C (145°F) is considered safe, though many cooks prefer a slightly higher temperature for softer texture.
7. Can I make this recipe ahead of time?
Yes. Cook the pork belly, refrigerate it, and reheat in the air fryer before serving. This helps restore the crisp crackling.
8. What side dishes pair best with pork belly?
Popular options include roasted vegetables, mashed potatoes, rice, stir-fried greens, salads, pickled vegetables, and fresh bread.
9. Why should I rest pork belly before slicing?
Resting allows the juices to redistribute throughout the meat, resulting in a juicier final product and easier slicing.
10. Can I cook larger pieces of pork belly?
Yes. Larger pieces may simply require additional cooking time during the rendering stage before the final high-heat crisping phase.
Final Thoughts
Air Fryer Pork Belly is one of the most rewarding recipes you can make in an air fryer. With proper preparation, careful drying, and a two-stage cooking method, you can achieve incredibly crispy crackling and juicy, flavorful meat that rivals restaurant-quality results. While the process requires patience and attention to detail, the reward is a stunning dish with unbeatable texture, rich flavor, and irresistible crunch in every bite. Once you master this technique, air fryer pork belly is likely to become one of your favorite recipes for both everyday meals and special occasions.


