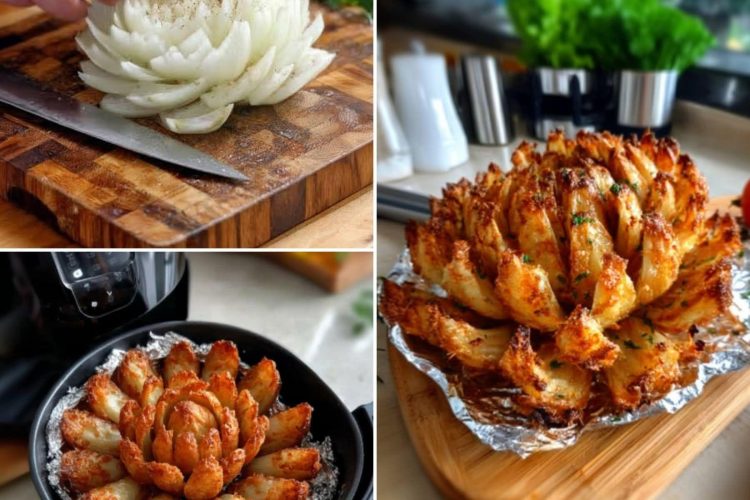
Mastering the art of creating a restaurant-quality crispy blooming onion recipe right in your own kitchen is much easier than most people think. This iconic deep-fried onion appetizer has long been a staple of popular steakhouses, drawing crowds with its dramatic, flower-like appearance and irresistibly crunchy texture. While the final product looks like something that requires advanced professional culinary training, achieving the perfect bloom is actually a straightforward process that relies on patience, proper technique, and precise temperature management. By understanding how the layers of a sweet onion behave when cut and fried, anyone can replicate this savory masterpiece at home for their next gathering, game day, or weekend treat.
The hidden difference between how food feels and how it tastes.
The absolute magic of a great deep-fried onion appetizer lies entirely in the stark contrast between the beautifully softened interior and the highly seasoned, ultra-crispy outer coating. As the onion cooks in the hot oil, its natural sugars break down and caramelize, transforming what is usually a sharp, pungent vegetable into a remarkably tender and sweet base. This natural sweetness is perfectly offset by a robust blend of savory spices embedded within the crunchy crust, creating a complex flavor profile that keeps people coming back for more. Every single bite delivers a satisfying textural combination that makes this specific dish standout among standard party appetizers.
Selecting the Onion for Frying
To achieve the best results, selecting the correct variety of onion at the local grocery store is a critical first step that cannot be overlooked. A large sweet onion is the absolute gold standard for this recipe because its natural flavor profile lacks the intense bite of standard yellow or red onions. Furthermore, these specific sweet varieties feature much thicker, more robust internal layers, which are essential for creating the wide, sturdy petals needed to form the iconic flower shape. Choosing an onion that is too small will result in tightly packed layers that refuse to separate properly, ultimately ruining the dramatic visual effect and preventing the batter from coating the interior surfaces.
Checking how solid and strong something is to make sure it will not break.
In addition to choosing a sweet variety, you must also pay close attention to the overall physical condition and firmness of the vegetable before beginning. The onion must feel completely solid and heavy for its size, with tightly wrapped, papery outer skins that show absolutely no signs of soft spots, bruising, or premature sprouting. A fresh, firm onion possesses the necessary structural integrity to withstand the intricate cutting process and the subsequent deep frying without collapsing into a mushy mess. Investing a few extra moments to source a premium, large, flawless sweet onion ensures that your final dish will open up beautifully and hold its shape perfectly throughout the cooking process.
Onion Cutting Process
The specific cutting method used to transform a solid vegetable into a beautiful blooming flower is often considered the most intimidating part of the entire process, but it simply requires a slow, steady approach. To begin, you want to carefully slice off approximately half an inch from the pointed top of the onion to create a completely flat surface while leaving the root end entirely intact. The root is the most vital component of the entire structure, acting as the natural anchor that holds all of the individual petals together during both the intense battering process and the high-heat deep frying stage.
Cut carefully in straight lines from the center to the edge.
Once the top is removed and the outer papery skin is peeled away, place the onion flat-side down on a sturdy cutting board so the root end faces directly upward. Using a very sharp chef’s knife, you will make a series of straight vertical cuts starting about half an inch away from the root core and slicing all the way down to the cutting board. It is best to work systematically by first dividing the onion into four equal quarters, and then dividing each of those quarters into three or four smaller, even segments until you have created between twelve and sixteen uniform cuts.
Using the Ice Water Method
After completing all the vertical slices, carefully flip the onion over and gently use your fingertips to encourage the individual petals to fan outward from the center core. If the layers feel a bit stubborn or tightly bound, you can submerge the cut onion in a bowl of ice-water for roughly ten minutes, which naturally crisps the vegetable and forces the petals to open up automatically. Taking your time during this crucial preparation stage ensures that every single layer is separated enough to receive an even distribution of the seasoned flour mixture later on.
Organizing the Multi-Bowl Batter Station
Setting up a highly organized coating station is absolutely essential for managing the somewhat messy process of battering the onion without creating a chaotic kitchen disaster. You will need two large, deep bowls that are wide enough to accommodate the full wingspan of the opened onion flower without crowding or breaking the delicate petals. The first bowl will contain your dry ingredients, which consist of standard all-purpose flour mixed thoroughly with a potent combination of smoked paprika, garlic powder, and a precise pinch of cayenne pepper for a subtle kick. The second bowl will hold the liquid components, consisting of whole milk and eggs whisked together until completely smooth and uniform.
Setting up the station for multiple bowls of batter
The unique seasoning blend used in the flour mixture is carefully calibrated to deliver a deeply satisfying, savory profile that complements the sweetness of the caramelized onion perfectly. Smoked paprika provides a gorgeous golden-red color and a subtle, woodsy depth, while garlic powder infuses the crust with an essential savory richness that pairs beautifully with fried foods. The inclusion of cayenne pepper is not meant to make the dish overly spicy, but rather to introduce a gentle back-of-the-throat warmth that cuts through the inherent richness of the deep-fried batter and the creamy dipping sauce.
Commencing the First Flour and Liquid Coatings
Achieving the legendary crunch of a restaurant-style appetizer requires a strict double-dipping technique that builds up a substantial, durable layer of textured crust on every surface. You begin by lowering the opened onion into the seasoned flour bowl, using your fingers to gently separate each petal to ensure the dry powder coats every hidden nook and cranny. After shaking off any excess loose flour, submerge the onion completely into the egg and milk mixture, turning it upside down to guarantee that the liquid penetrates deep between the inner layers to act as a glue.
Perfecting the Second Dip for Maximum Crunch
Immediately after the liquid bath, lift the onion out, allow the excess egg wash to drain off for a few seconds, and return it to the seasoned flour bowl for its final, crucial coating. During this second dip, be incredibly thorough when spinning the onion through the flour, ensuring that every wet spot is completely covered and that the petals remain separated rather than clumping together into a solid block. This double-layering process creates a thick, craggy exterior that traps moisture inside the onion while developing an incredibly crispy, golden shell upon contact with the hot frying oil.
Allowing the Batter to Hydrate and Set
Once the final coating is applied, it is incredibly important to let the battered onion rest undisturbed on a clean baking sheet or wire rack for about fifteen minutes before frying. This brief resting period allows the flour to fully absorb the moisture from the egg wash, effectively hydrating the starches and turning the loose powder into a cohesive, secure batter that clings tightly to the onion. Skipping this vital step will often cause the precious seasoned crust to slough off the vegetable the moment it hits the turbulent, bubbling oil, resulting in a patchy and disappointing final texture.
Sourcing the Best High Smoke Point Cooking Oil
While the onion is resting, you can focus on preparing your frying vessel by filling a large, heavy-bottomed stockpot or Dutch oven with high-quality frying oil that boasts a high smoke point. Oils such as peanut, canola, or corn oil are ideal choices because they can withstand high temperatures for extended periods without breaking down, smoking, or imparting unwanted bitter flavors to your food. You will need enough oil to completely submerge the entire onion flower, which generally requires a depth of at least three to four inches depending on the specific dimensions of your cooking pot.
Stabilizing the Crucial 375-Degree Frying Temperature
Maintaining a steady and accurate oil temperature of exactly 375 degrees Fahrenheit is the ultimate secret to achieving a perfectly cooked, non-greasy blooming onion. If the oil temperature drops too low when the onion is introduced, the batter will act like a sponge, absorbing an excessive amount of grease and resulting in a heavy, soggy, and unappealing appetizer. Conversely, if the oil is allowed to get too hot, the delicate outer spices and flour will burn to a bitter crisp long before the thick interior layers of the onion have a chance to soften and cook through.
Executing the First Stage of Deep Frying
When the oil reaches the correct temperature, carefully lower the battered onion into the pot using a large slotted spoon or a wire skimmer, placing it cut-side down first. The initial immersion will trigger a dramatic surge of bubbling as the moisture in the onion rapidly evaporates, which helps to lock the beautiful flower shape into place permanently. Let the onion fry undisturbed in this position for several minutes to allow the top edges of the petals to crisp up beautifully before attempting to move or flip the delicate structure within the hot oil.
Flipping the Flower for Even Interior Cooking
After the initial side has developed a sturdy crust, gently use tongs or a wire spider to carefully flip the entire blooming onion over so it sits root-side down in the oil. This allows the heat to penetrate deep into the center core, ensuring that the thickest parts of the vegetable become perfectly tender while the remaining batter turns a glorious, uniform golden-brown color. The entire frying process should take roughly seven to ten minutes, and you should monitor the heat closely using a digital kitchen thermometer to adjust your stove burner as needed.
Draining Excess Grease Post-Frying
Once the blooming onion achieves a uniform golden-brown hue and a perfectly crisp texture all over, carefully lift it out of the hot oil using your wire skimmer, allowing the trapped grease to drain back into the pot. Transfer the hot onion immediately to a plate lined with several layers of thick paper towels, positioning it upside down for a minute so any oil caught deep between the petals can easily run out. While it drains and cools slightly, the aroma of toasted garlic, smoked paprika, and sweet caramelized onion will completely fill your kitchen space.
Engineering the Signature Tangy Horseradish Dip
No homemade blooming onion experience is truly complete without the addition of the signature creamy, tangy, and slightly spicy dipping sauce that traditionally accompanies this famous dish. This classic accompaniment relies on a smooth mayonnaise base for rich creaminess, combined with a splash of ketchup for a hint of sweetness and an appealing pinkish color. The real magic ingredient is prepared horseradish, which introduces a sharp, nasal pungency that beautifully cuts through the heavy richness of the deep-fried batter, creating a perfectly balanced flavor profile that enhances every single bite.
Mixing and Chilling the Velvety Sauce
To finish the homemade blooming onion sauce, you simply whisk the mayonnaise, ketchup, and prepared horseradish together with a dash of smoked paprika, salt, and black pepper until completely smooth. It is highly recommended to prepare this sauce ahead of time and let it chill in the refrigerator while you work on the onion, as the cold temperature allows the sharp horseradish and smoky spices to meld seamlessly into the creamy base. The resulting condiment is thick, velvety, and clings beautifully to the crispy edges of the fried onion petals.
Serving the Centerpiece Hot for Maximum Engagement
For the absolute best sensory experience, this magnificent deep-fried appetizer must be served immediately to your guests while it is still piping hot and at its peak level of crispiness. Present the blooming onion on a large, beautiful platter with the chilled dipping sauce nestled securely in a small ramekin placed right in the cleared center of the onion flower. This clever arrangement invites people to playfully pull the individual crunchy petals away from the central root core and dip them deep into the savory sauce, making it a highly interactive and engaging culinary centerpiece.
Recipe Notes and Troubleshooting
- Preventing a Soggy Crust: Always ensure your frying oil returns to 375°F before dropping the onion into the pot. If frying multiple onions, cook them one at a time to avoid dropping the oil temperature dramatically.
- Cutting Precision: If you accidentally cut all the way through the root, do not panic. You can still dip and fry the individual loose onion wedges using the exact same battering method to create delicious crispy onion petals.
- Make-Ahead Tips: While the fried onion must be enjoyed fresh, you can prepare the dipping sauce up to 24 hours in advance and store it in an airtight container in the refrigerator to save time on the day of serving.
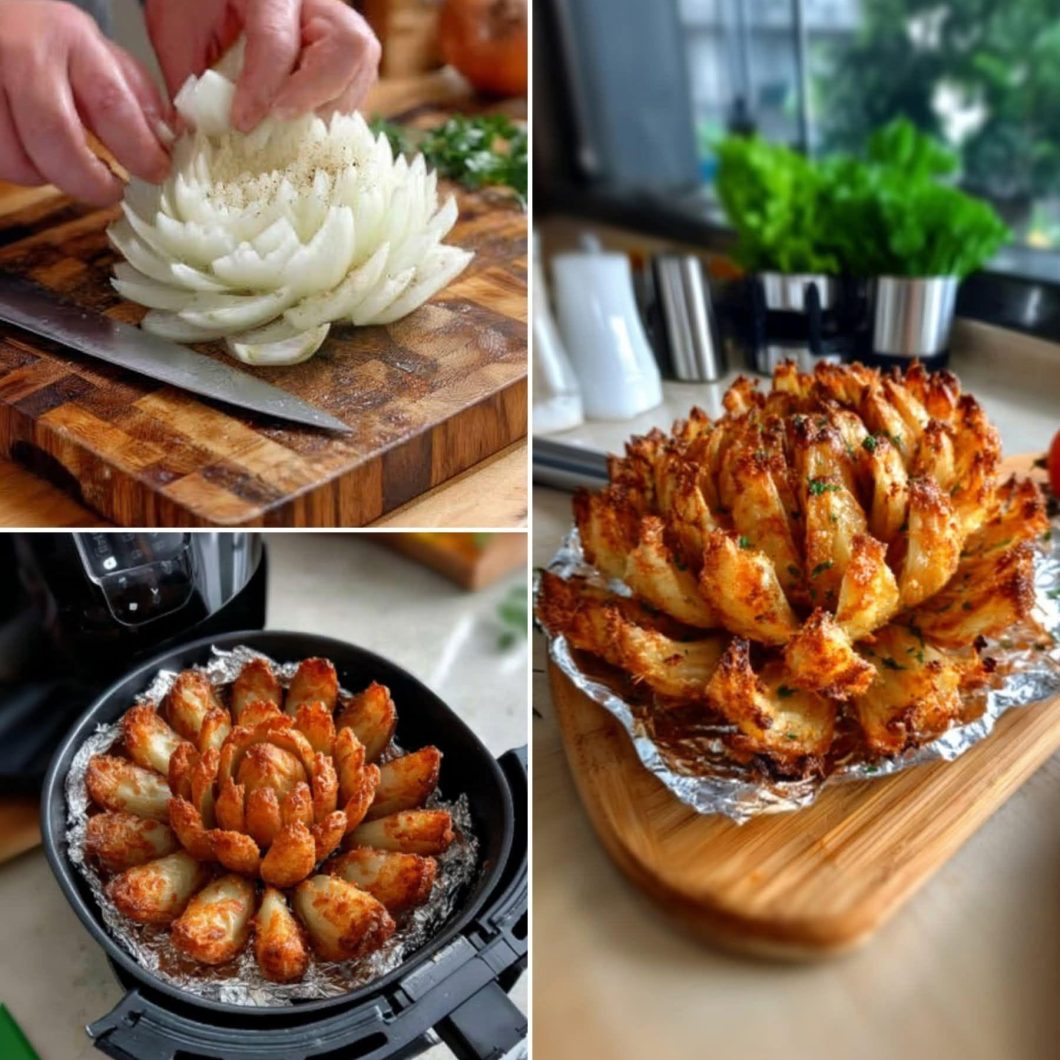
The Ultimate Guide to Making a Crispy Homemade Blooming Onion
 Recipe by admin1
A spectacular, extra-crispy deep-fried sweet onion flower served alongside a creamy, tangy, and smoky horseradish dipping sauce.
4
servings25
minutes10
minutes465
kcal15
minutes50
minutesIngredients
- For the Onion Flower and Coating
1 large sweet onion (such as Vidalia or Walla Walla)
2 ½ cups all-purpose flour
1 tablespoon smoked paprika
1 tablespoon garlic powder
½ teaspoon cayenne pepper
2 large eggs
1 cup whole milk
Frying oil (such as canola, peanut, or corn oil), for deep frying
- For the Signature Dipping Sauce
½ cup mayonnaise
2 tablespoons ketchup
2 tablespoons prepared horseradish
¼ teaspoon smoked paprika
Salt, to taste
Freshly ground black pepper, to taste
Directions
- Prep and Cut the Onion
- Slice off the top half-inch of the sweet onion to create a flat top surface. Peel away the dry, papery outer skin layers. Leave the bottom root end completely intact.
- Place the onion flat-side down on your cutting board with the root end facing upward.
- Position a sharp chef’s knife about half an inch away from the root core. Make a straight vertical cut all the way down to the board.
- Repeat this process to divide the onion into 4 equal quarters. Cut each quarter into 3 to 4 even slices, creating 12 to 16 total cuts. Do not cut through the root.
- Turn the onion over and use your fingers to gently fan out the layers into a flower shape.
- Prepare the Coating Station
- In a large, wide bowl, whisk together the all-purpose flour, smoked paprika, garlic powder, and cayenne pepper until completely combined.
- In a separate wide bowl, thoroughly whisk together the eggs and whole milk until the mixture is completely smooth.
- Batter the Onion
- Place the opened onion flower into the seasoned flour mixture. Gently open the petals to ensure the flour gets into every gap. Lift and shake off the excess.
- Submerge the floured onion completely into the egg and milk mixture, turning it to ensure every surface is wet.
- Remove the onion from the liquid, let the excess drip away, and return it to the flour bowl for a second coat. Thoroughly cover every single petal with flour.
- Set the fully battered onion on a clean surface to rest for 15 minutes so the coating sets.
- Fry to Golden Perfection
- Fill a deep, heavy-bottomed pot with 3 to 4 inches of frying oil. Heat over medium-high until a kitchen thermometer reads exactly 375°F.
- Carefully lower the rested onion into the hot oil, cut-side down. Fry undisturbed for 3 to 4 minutes.
- Gently flip the onion over to the root-side down position. Fry for another 3 to 4 minutes until the entire exterior is a deep golden-brown and crispy.
- Remove the onion using a slotted utensil and drain it upside down on paper towels.
- Mix the Sauce and Serve
- In a small bowl, combine the mayonnaise, ketchup, prepared horseradish, smoked paprika, salt, and black pepper. Whisk until smooth.
- Place the warm blooming onion on a serving platter. Serve immediately alongside the chilled dipping sauce.
Nutrition Facts
- Calories: 465kcal
- Fat: 28g
- Carbohydrates: 45g
- Fiber: 3g
- Sugar: 7g
- Protein: 9g


